Hi!
I´ve tried an experiment. Is it posible to make slides with C41 color film using C41 chemistry?
Yes, it is. The result, better that expected.
The first problem is, as we know, color film has an orange base. So, the slides will have that orange tint. That was the main difficulty, try to eliminate or mitigate that.
This is important. This is how I remove halfway the orange base. I just used cyan filter from the kit the I use for enlarge prints.

This is the kit: https://www.freestylephoto.com/31633-Arista-RA-4-Color-Filters-3x3-in.-21-Pack
If you take the base of color film and add it the filter, the image is neutral. Example (made with Iphone 13):


The more cyan added, the larger the correction is.
The second obstacle? This is the very first time that doing this process, I have no idea of the chemicals and times “recommended”. Is like to win the lottery.
How i shot it? The roll is Fuji 200 (not C200). Nikon camera and 50mm 1.8D. The scene was harsh light on a bright sunny day. February in South Spain. I shot it at 12, 25, 50, 100, 200 and 400 ISO. Every line of six photos has the same cyand filtration. So:
So, the chemicals. This is what I used and the times:
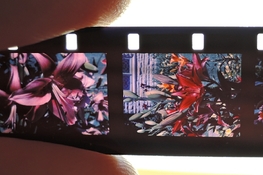
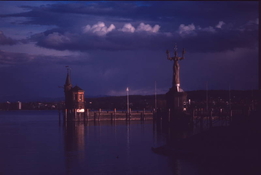
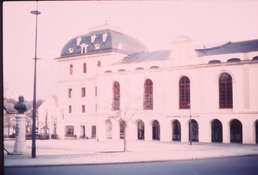
The results:
For me, very good results. The cyan filtration is noticeable, but the temperature of the photos is a little bit cold. Maybe adding a light yellow filter (that the kit has too) i get a warmer photo. The exposure, ISO 100 or 200. It depends of the light situation.


Full res:
I like the 100 ISO + 80 cyan version (sixth lane, fourth photo) and I think that i should increase the filtration to eliminate more of the orange base in the future. I don´t know if I will make a continuation is this “project”. I am sorry but i can´t scan the photos a better way. In reality it looks way better.
I would like to read your comments.
I´ve tried an experiment. Is it posible to make slides with C41 color film using C41 chemistry?
Yes, it is. The result, better that expected.
The first problem is, as we know, color film has an orange base. So, the slides will have that orange tint. That was the main difficulty, try to eliminate or mitigate that.
This is important. This is how I remove halfway the orange base. I just used cyan filter from the kit the I use for enlarge prints.
- Orange Base + Cyan Filter:
This is the kit: https://www.freestylephoto.com/31633-Arista-RA-4-Color-Filters-3x3-in.-21-Pack
If you take the base of color film and add it the filter, the image is neutral. Example (made with Iphone 13):
- Neutral photo:
- With orange base film in front of the lens:
- With orange base + 50 cyan in front of the lens:
The more cyan added, the larger the correction is.
The second obstacle? This is the very first time that doing this process, I have no idea of the chemicals and times “recommended”. Is like to win the lottery.
How i shot it? The roll is Fuji 200 (not C200). Nikon camera and 50mm 1.8D. The scene was harsh light on a bright sunny day. February in South Spain. I shot it at 12, 25, 50, 100, 200 and 400 ISO. Every line of six photos has the same cyand filtration. So:
| 12 ISO + 0 Cyan | 25 ISO + 0 Cyan | 50 ISO + 0 Cyan | 100 ISO + 0 Cyan | 200 ISO + 0 Cyan | 400 ISO + 0 Cyan |
| 12 ISO + 40 Cyan | 25 ISO + 40 Cyan | 50 ISO + 40 Cyan | 100 ISO + 40 Cyan | 200 ISO + 40 Cyan | 400 ISO + 40 Cyan |
| 12 ISO + 50 Cyan | 25 ISO + 50 Cyan | 50 ISO + 50 Cyan | 100 ISO + 50 Cyan | 200 ISO + 50 Cyan | 400 ISO + 50 Cyan |
| 12 ISO + 60 Cyan | 25 ISO + 60 Cyan | 50 ISO + 60 Cyan | 100 ISO + 60 Cyan | 200 ISO + 60 Cyan | 400 ISO + 60 Cyan |
| 12 ISO + 70 Cyan | 25 ISO + 70 Cyan | 50 ISO + 70 Cyan | 100 ISO + 70 Cyan | 200 ISO + 70 Cyan | 400 ISO + 70 Cyan |
| 12 ISO + 80 Cyan | 25 ISO + 80 Cyan | 50 ISO + 80 Cyan | 100 ISO + 80 Cyan | 200 ISO + 80 Cyan | 400 ISO + 80 Cyan |
So, the chemicals. This is what I used and the times:
1º Developer: HC110 Dilution B (1+31) at 40ºC (104ºF) during 13 minutes – First minute continuous agitation, then 5 rotations every minute. In this step the tank is not moving. The temperature is mantained with a sous vide and a digital thermometer. IMPORTANT: The thank was also warmed up in the sous vide. Not prewashed.
2º Wash: 6 water changes. 300ml of water at around 40ºC, rotating each 30 seconds.
3º Fogging: The film, with the spiral, fogged with an LED 5,5W during 3 minutes at 20cm close. Room with little light from the window. Assure the light reaches all parts of the film.
4º C41 Developer: Normal dilution and time. Im my case, I used Bellini C41 so, 3:15 minutes at 38ºC (100,4ºF) rotating.
5º Stop Bath: Dilution of acetid acid, 30 seconds.
6º Wash: Just one, 30s seconds.
7º Bleach and Fix: For the bleach, Bellini says 1 minute, I did 3 minutes. For the fix, Bellini says 2 minutes, I did 5 minutes.
8º Final Wash. Personally, 8 changes of 300ml of water, rotating, each one 30 seconds.
9º Optional: Stabilizer.
The results:
For me, very good results. The cyan filtration is noticeable, but the temperature of the photos is a little bit cold. Maybe adding a light yellow filter (that the kit has too) i get a warmer photo. The exposure, ISO 100 or 200. It depends of the light situation.
Full res:
I like the 100 ISO + 80 cyan version (sixth lane, fourth photo) and I think that i should increase the filtration to eliminate more of the orange base in the future. I don´t know if I will make a continuation is this “project”. I am sorry but i can´t scan the photos a better way. In reality it looks way better.
I would like to read your comments.
Last edited:


