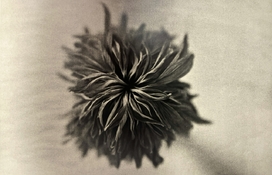
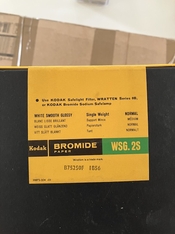
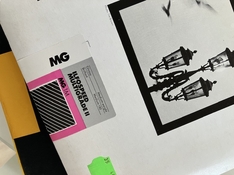
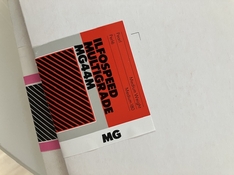
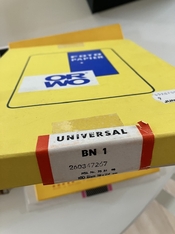
As mentioned above, the only thing you'll need beyond regular darkroom stuff is lith developer (Moersch Easy Lith is a good place to start) and paper that is known to lith easily without any other issues (like Fomatone MG 131 or 132). Once you get comfortable with that, you can start exploring other papers, developers, and techniques. In terms of developer temp, I always start hot - somewhere between 30-40C to keep times manageable - that means prints that I can pull out of the developer between 4-10 minutes. Once longer than ten minutes I either make a new batch or add more hot water/dev to the tray.
Exposure: the less exposure you give your prints, the more contrasty they will be. So 1-2 stops overexposure will give you more contrasty prints than 2-5 stops overexposure. A lot depends on the subject of your print. The reason you want to overexpose is to get details in the midtones and highlights - if they're not there in the exposure, they won't show up in the developing tray, no matter how long you keep the print in there. The blacks are going to come up no matter what, due to how lith developer works. What you are exposing for is the highlights (if you want them).
Also - you don't need to work in whole stops for overexposure once you've started at the base exposure of 2 stops over - it's worth trying 1/2 or even 1/4 stops if you want to make more subtle adjustments. Doing selective (dare I say it - split grade) printing over different parts of the print can help you out a lot. For example, with this print (see below) in my gallery, the base exposure (for the darkest part of the print) was 1.5 stops overexposed. After that, I had to selectively burn in every other part of the print. The lightest parts had 5-7 stops additional burning, just so I could get some details. However - to start with I wouldn't worry about it so much, just go with straight over-exposure, once you've done 5 or 10 or 20 prints you'll start to see where selective overexposure can help your print.
 Developing
: Put the paper image side down as fast as you can to make sure it is evenly covered. Keep agitating the tray for the entire development time as you need to the developer to do its magic. I always use gloved hands (nitrile gloves) to handle my print since tongs can leave marks on the print, but it's up to you how you want to do it. If you want to save time, you can develop two prints back to back and just constantly flip them throughout to provide agitation and development. This is useful if you are looking for consistency OR you want to experiment by having 2 prints at the same exposure but different dev. times, or 2 prints with different exposures but equal development times. If you can spare the paper, it's worth pulling prints (ideally with the same exposure) at different times - too early, too late, etc. so that you can see what the effects will be once the print has dried down. Depending on the paper and the developer/dilution, you'll probably get 5-12 good prints before you need to top up the used developer with a fresh one, or just make a new batch (usually only happens with long sessions). Some papers may exhibit pepper fogging (little black grains throughout the print) the older the developer gets.
Things to remember: the more diluted your developer is (1:20-1:50 dilution), the longer the time will be. You'll also get more colourful effects from extreme dilution, less so with stronger mixes. Temperature also affects colour - the hotter the developer, the more colour will likely appear (although again depends on developer and paper). As Wolfgang Moersch wrote somewhere here on APUG in the archives, less exposure means you'll have a stronger dilution, more over-exposure means you'll have a weaker dilution (there's a correlation between the two). Also, each subsequent print will slow down in the developer - the first one may come up at 4 minutes, the 10th one may take 20. I find that once I can first see the image just slowly beginning to emerge, that I can expect to pull the print in about double that time. This is good to know if you are waiting and waiting and waiting - if you are waiting for a really long time, probably the developer is either too cold, too old, or too dilute. For example, a paper that I like to use here in Japan is called Fujibro - at 20C it will take 30-60 minutes for an image to appear, but at 40C it takes 5 minutes.
Golden Rule (as per Tim Rudman): Highlights are controlled by exposure. Shadows are controlled by development. The highlights will come up as they are based on the over-exposure. A successful print is one where you look at the part of the print where you want your black/shadow details to be clear and fully developed, but not so much so that they start spreading to the surrounding area (which is what will happen if you keep the print in the developer too long). Pull the print when the blacks are where you want them (not the highlights). Once you see what you like, you need to pull the print. Don't wait for the developer to drip off the print, put it straight into the stop.
Fixing: Here is where you want to keep the fix time to the minimum amount, since the fix will "bleach" your highlights if left in too long. I always do a 2-bath fix for exactly the recommended time (if it's 2 minutes, one minute in each bath). You'll find that the images will lighten, or "fix up" and that you'll lose the colour that you had in the developer. This also happens with regular B&W but is much less dramatic (I only notice it because I've done so much lith printing). Don't worry if you think you've lost your highlights, in all likelihood they'll reappear in the dry-down. When I did my workshop with Tim Rudman, once our prints went through the initial wash we would quickly wipe down and dry the prints with a hair dryer to check the dry-down, so we could make adjustments before the next print. You don't always have to do that, but it's worth considering for trickier prints.
After washing your prints, dry them carefully. If face-down on screens, beware that if you do future work on the print (toning, etc.) you may find the screen marks will show up. If you dry face up, make sure that no water pools on the print in any way, as those will also show up in dry-down or toning. (As Tim Rudman says, your "sins" will find you out in lith printing). I haven't had the former happen to me, but the latter definitely did.
If you have prints that are too dark or too light, keep them. You may find that with bleaching, toning, or second-pass lith that you can get something better out of them. It's worth keeping the mistakes for testing toners before putting the good prints in.
It's worth looking at other photographers who've done lith for inspiration, even if the papers and developers they used are no longer available. Of course both
Tim Rudman and
Wolfgang Moersch have information on their own websites, but there are many others you can look at as well. The lith printing group on Facebook also has a lot of people doing interesting work there.
I always like
Skip Smith's work with lith - he used very old, aged developer get to a lot of texture and detail into his prints.
Stuart Redler's work, especially his arches series, shows what you can do with a more contrasty style
Anton Corbijn's book
Star Trax showcases wonderful portraits of the rich and famous done in lith (as printed by Mike Spry)
EDIT: it's worth keeping notes when you first start. Even if you just mark each print (1,2,3,etc) and write the details in a notebook, including overexposure and time in the developer, it will help you understand the relationship between all the factors above and how to possibly fix things that you don't like. But honestly, lith printing is like jazz - everytime you do it it can be a little bit different, or completely different, but it'll be interesting. Despite everything I wrote here, it's very freeing and you can just go with the flow and see what comes up each time the print goes in the developer. Don't be afraid to experiment.


 What lithable paper do you recommend me to start with that is still in production and available?