A day's work in the darkroom...

Forum statistics

Threads
197,289
Messages
2,757,099
Members
99,449
Latest member
APL
Recent bookmarks
0
OP
OP
Marco B

Marco B

Subscriber
Joined
Jan 13, 2005
Messages
2,709
Location
The Netherla
Format
Multi Format
A partially bleached and as comparison a fully ferricyanide bleached print, both at the washing stage before toning in thiocarbamide / thiourea.

As my intention is to split or at least dual tone with selenium, the fully bleached print is just as example from a test print for a negative that I wasn't sure I would like to make a final print for, and that was printed sub-optimally and to dark in parts.
 

Attachments

  • 20250308_221443.jpg
    20250308_221443.jpg
    165.5 KB · Views: 28
  • 20250308_222749.jpg
    20250308_222749.jpg
    111.9 KB · Views: 26
OP
OP
Marco B

Marco B

Subscriber
Joined
Jan 13, 2005
Messages
2,709
Location
The Netherla
Format
Multi Format
The fully sepia toned test print that was sub-optimally printed. I am not a particular fan of full sepia toning, nor do I like it here. The loss of full black and hence contrast, and the overly brown print color, rarely work to enhance the character of the print. I much prefer partial sepia toning, only warming up the highlights.

That said, it kind of worked in my Fort Vechten photos, where the white painted brick walls of the 19th century fortress reduced the objectional brown and enhanced the appearance of contrast through the bright faint colored highlights of the walls:


Attachments

  • 20250308_230710.jpg
    20250308_230710.jpg
    214.2 KB · Views: 32
OP
OP
Marco B

Marco B

Subscriber
Joined
Jan 13, 2005
Messages
2,709
Location
The Netherla
Format
Multi Format
Spilt toned print with sepia and selenium. I much prefer this type of toning.
 

Attachments

  • 20250309_002256.jpg
    20250309_002256.jpg
    177.8 KB · Views: 37

koraks

Moderator
Moderator
Joined
Nov 29, 2018
Messages
20,450
Location
Europe
Format
Multi Format
Spilt toned print with sepia and selenium. I much prefer this type of toning.

Yeah, that's a nice combination. Coincidentally, I have a few in a final wash tray right now as well.
1741476821152.png

I prefer fairly pronounced toning, especially in the wet prints since the dry-down reduces the saturation significantly. With selenium after sepia, I like how the sepia tone shifts to a magenta hue. Some find this obnoxious, I think it's lovely.
 
OP
OP
Marco B

Marco B

Subscriber
Joined
Jan 13, 2005
Messages
2,709
Location
The Netherla
Format
Multi Format
Yeah, that's a nice combination. Coincidentally, I have a few in a final wash tray right now as well.
View attachment 393205
I prefer fairly pronounced toning, especially in the wet prints since the dry-down reduces the saturation significantly. With selenium after sepia, I like how the sepia tone shifts to a magenta hue. Some find this obnoxious, I think it's lovely.

What paper are you using? Mine is the new Ilford MGFB. Any magenta shift is minimal, but then selenium toning itself is subtle, at least when not using a warmtone paper.
 
OP
OP
Marco B

Marco B

Subscriber
Joined
Jan 13, 2005
Messages
2,709
Location
The Netherla
Format
Multi Format
Final prints...
 

Attachments

  • 20250309_014907.jpg
    20250309_014907.jpg
    222.3 KB · Views: 40

koraks

Moderator
Moderator
Joined
Nov 29, 2018
Messages
20,450
Location
Europe
Format
Multi Format
This is Fomabrom. Keep in mind that the sepia Toni g was initially already quite pronounced and I opted for a high NaOH to thiourea ratio to begin with. This already shifts the hue away from yellow tones and towards chocolate brown. Subsequent sepia toning was also done quite deeply. As said, this is all intentional since I prefer this magenta tinge.

It's also interesting to flip the order; first selenium and then sepia. This gives a different hue shift that's inherently less magenta.

Of course, your question was a good one - toning brings out differences between papers that remain mostly invisible otherwise!
 

MattKing

Moderator
Moderator
Joined
Apr 24, 2005
Messages
51,801
Location
Delta, BC Canada
Format
Medium Format
A partially bleached and as comparison a fully ferricyanide bleached print, both at the washing stage before toning in thiocarbamide / thiourea.

As my intention is to split or at least dual tone with selenium, the fully bleached print is just as example from a test print for a negative that I wasn't sure I would like to make a final print for, and that was printed sub-optimally and to dark in parts.

For clarity, I assume you must be using a re-halogenating ferricyanide based bleach, not a pure ferricyanide bleach, otherwise you wouldn't be able to re-develop in subsequent toner.
 
OP
OP
Marco B

Marco B

Subscriber
Joined
Jan 13, 2005
Messages
2,709
Location
The Netherla
Format
Multi Format
For clarity, I assume you must be using a re-halogenating ferricyanide based bleach, not a pure ferricyanide bleach, otherwise you wouldn't be able to re-develop in subsequent toner.

It's just a commercial toning kit I used, so yes, it likely is, but I don't know the exact contents and chemistry going on.

Clearly, the silver is oxidized, likely by the transition of ferricyanide to ferrocyanide, which absorbs the electron released by the silver. But what else is in the A bleach bottle, IDK.
 

koraks

Moderator
Moderator
Joined
Nov 29, 2018
Messages
20,450
Location
Europe
Format
Multi Format
99.99% certain it's potassium bromide. Btw, replacement of the bromide with another halide (iodide, chloride) also works and gives subtle hue shifts. The result of adjusting the activator:toner ratio has a far stronger effect, so I never bothered with anything else than bromide apart from some testing to understand the differences.

Whether a pure ferricyanide bleach would also work - IDK, I've not tested it. It'll be slooooow in comparison with a ferricyanide/bromide bleach; for some reason, it really helps if there's a source of halides for the silver to combine with. Other than that, I'd expect that silver ferrocyanide would form (which is a solid like silver bromide, so won't wash away readily) and I guess that the silver would turn into silver sulfide upon subsequent exposure to a thiourea + hydroxide toner. So I'm not too sure @MattKing whether what you say is true. Have you tried it? I haven't, so I'm just speculating here.
 
OP
OP
Marco B

Marco B

Subscriber
Joined
Jan 13, 2005
Messages
2,709
Location
The Netherla
Format
Multi Format
Yes, as I understood it, it is silversulphide that is ultimately formed and protects the image as being much more stable than elemental metallic silver. I guess the added hydroxide changes the size of the formed particles / crystals, thus visually changing the color hue depending on the amount.
 
OP
OP
Marco B

Marco B

Subscriber
Joined
Jan 13, 2005
Messages
2,709
Location
The Netherla
Format
Multi Format
Final drying against glass. Although laborious, this is my preferred method of drying, as it results in perfectly flat fiber prints. As I did not have time yesterday (it was already well past 1:00am at night when I finished the selenium toning), I first let the prints hanging to dry, resulting in terrible curl.

I now resoaked them and taped them down with artist tape. I use a plant spray set to disperse fine droplets to wet the tape. This results in sparse droplets on the tape with one quick spray movement from about 25 cm from the tape. This prevents overwetting of the tape, which can lead to glue running from the tape below the photopaper, causing the photo to stick to the glass and likely be damaged and teared when attempting to remove it from the glass.

Since I use a vertical glass indoor window, I first tape down the top part of the photo and then when enough of the water ran of the paper I commence with the sides and finally the bottom of the photo.
 

Attachments

  • 20250309_114931.jpg
    20250309_114931.jpg
    206 KB · Views: 35
  • 20250309_115042.jpg
    20250309_115042.jpg
    177.7 KB · Views: 35
  • 20250309_115135.jpg
    20250309_115135.jpg
    112.8 KB · Views: 32

Ben 4

Member
Joined
Sep 20, 2005
Messages
212
Location
Lancaster, P
Format
Medium Format
Final drying against glass. Although laborious, this is my preferred method of drying, as it results in perfectly flat fiber prints. As I did not have time yesterday (it was already well past 1:00am at night when I finished the selenium toning), I first let the prints hanging to dry, resulting in terrible curl.

I now resoaked them and taped them down with artist tape. I use a plant spray set to disperse fine droplets to wet the tape. This results in sparse droplets on the tape with one quick spray movement from about 25 cm from the tape. This prevents overwetting of the tape, which can lead to glue running from the tape below the photopaper, causing the photo to stick to the glass and likely be damaged and teared when attempting to remove it from the glass.

Since I use a vertical glass indoor window, I first tape down the top part of the photo and then when enough of the water ran of the paper I commence with the sides and finally the bottom of the photo.

I've never tried drying prints that way, but am always interested in alternatives: why do you wet the tape (presumably after it's already applied to the print and glass?)?
 
OP
OP
Marco B

Marco B

Subscriber
Joined
Jan 13, 2005
Messages
2,709
Location
The Netherla
Format
Multi Format
I've never tried drying prints that way, but am always interested in alternatives: why do you wet the tape (presumably after it's already applied to the print and glass?)?

This artist's tape only starts to become sticky if you make the glue side wet. I think it is a simple starch based glue or something, harmless to the photo paper. Artist's shops sell it, likely for use with watercolor paper.
 
Last edited:
OP
OP
Marco B

Marco B

Subscriber
Joined
Jan 13, 2005
Messages
2,709
Location
The Netherla
Format
Multi Format
A few more tips for if you want to try this method of drying FB paper:

- Keep a kitchen towel at hand to remove excess water running of the print.
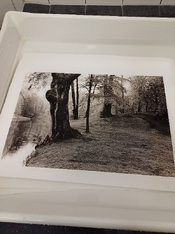
- Let the water run down of your print until it trickels.
- Put the paper against the glass - without(!) - applying pressure. Simply let it 'stick' on the still present waterfilm. If you apply pressure, you make it more likely the paper itself will stick to the glass and tear. This won't happen if you do as I write.
- Wait until the waterfilm has receded far enough from the top of the print to safely apply the top tape, all the while using the towel to remove water slowly trickling of the print. This usually takes about 10 minutes.
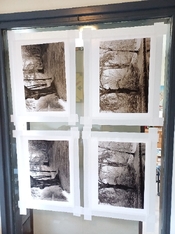
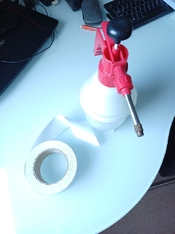
- Cut the artist's tape and use the plant spray set to disperse fine droplets to wet the tape. Glue side is inside of roll. Distance about one feet, quick run down from top to bottom of the stretch of tape held in your left hand. The tape should NOT be soaked! Only sparse droplets visible on the tape, see photo.
- Put the tape over the top of the print with a 1cm overlap. Do NOT apply pressure to the tape and print!!! Use a very soft caressing gesture to make it stick properly to the print and glass, this is enough! The glue is very sticky when wett, and will hold the print fine when it dries and tension on the paper starts flattening it totally. Putting pressure will enhance the risk of glue getting behind the print or the print by itself sticking to the glass, causing tears.
- If the paper or tape was to wet, water with glue may trickle over the surface of the print. Either use the towel to to collect it if you notice this in time, or start anew by resoaking and quick wash in water to remove the glue.
- After about 20 minutes or so, you can apply the tape to the sides. Use the towel to remove the thin layer of water collected at the bottom 0,5 cm of the print before doing this.
- After about 30 minutes it is usually safe to tape down the lower part, if the waterfilm has receded enough. Again use the towel to remove excess water visible before applying the tape.
- Do NOT wait to long either with applying the tape! Timing is crucial, as an already drying FB print sheet will apply significant force on the tape, and if the glue hasn't had enough time to dry and set, the shrinking paper will rip it loose and the paper will curl.
- If this happens, remove the print and soak it in water. The glue will easily dissolve in water and the remaining tape stuck to the print will float away. You can then start from scratch and try again.
- When the paper has fully dried, you can either try to tear it loose by the end of one of the tape strips. If you've used sparse droplets, the print may simply release easily from the glass. If that doesn't work, simply use a sharp knife to cut it from the glass, being carefull not to damage the print or scratch the glass.
- To clean the glass from remaining tape, simply soak the tape with warm water to dissolve the glue and remove the tape remains. Thoroughly rinse and wash the glass to remove all traces of the glue, or your next batch of prints may get ruined if you put the print over traces of glue. Again, the glue easily dissolves in warm water, so isn't problematic to remove.

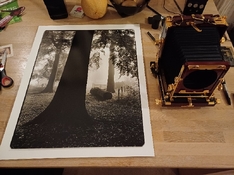
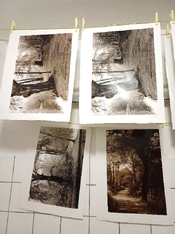
I usually put about 4 sheets at a time to the glass, and then work on all of them at the same time, which cuts down on the total time needed.

I have succesfully dried and flattened prints up to 50x60cm using this method.
 

Attachments

  • 20250309_151103.jpg
    20250309_151103.jpg
    112.4 KB · Views: 22
Last edited:

koraks

Moderator
Moderator
Joined
Nov 29, 2018
Messages
20,450
Location
Europe
Format
Multi Format
why do you wet the tape

The tape glues to the glass and the print through a thin layer of gum Arabic. You wet that so it becomes sticky.

I also often dry & flatten prints this way. It works well. The only real drawbacks are the space required and the fact that you have to sacrifice a margin of the paper. The tape cannot be removed afterwards.
 

MattKing

Moderator
Moderator
Joined
Apr 24, 2005
Messages
51,801
Location
Delta, BC Canada
Format
Medium Format
FYI, linen towels are the best for darkroom and similar uses. I find them well used in thrift stores - my favorites have images like "Castles of Scotland", the Eiffel Tower, or "The Golden Gate Bridge" on them - the more colourful the better :smile:
 

cliveh

Subscriber
Joined
Oct 9, 2010
Messages
7,479
Format
35mm RF
Although I have tried thiocarbamide/thiourea sepia toning, I don't think you can beat the original method with the smelly stuff. The trick is to print slightly darker before bleach and toning.
 
OP
OP
Marco B

Marco B

Subscriber
Joined
Jan 13, 2005
Messages
2,709
Location
The Netherla
Format
Multi Format
The tape glues to the glass and the print through a thin layer of gum Arabic. You wet that so it becomes sticky.

OK, so its gum arabic. Doesn't entirely suprise me considering the art context, but I didn't know this yet.
 

brian steinberger

Subscriber
Joined
Jan 5, 2007
Messages
2,982
Location
Pennsylvania
Format
Med. Format RF
Although I have tried thiocarbamide/thiourea sepia toning, I don't think you can beat the original method with the smelly stuff. The trick is to print slightly darker before bleach and toning.

Can you explain the differences you see? I bought some sodium sulfide a while back to try for myself for split toning. I’ve only ever used thio.
 
OP
OP
Marco B

Marco B

Subscriber
Joined
Jan 13, 2005
Messages
2,709
Location
The Netherla
Format
Multi Format
Although I have tried thiocarbamide/thiourea sepia toning, I don't think you can beat the original method with the smelly stuff. The trick is to print slightly darker before bleach and toning.

I am personally really pleased with the results I get from the dual bath bleach/redevelop toners, although obviously the extra bath and required washing stage is a significant burden, compensated by the odorlesness.

What is it you feel the polysulphide toners add?

With the bleach/redevelop toners I never felt the need to print darker, but this may be personal preference.
 

cliveh

Subscriber
Joined
Oct 9, 2010
Messages
7,479
Format
35mm RF
I think that sulphide toners add a deeper sepia richness to the print. It also has an archival lifespan for eternity.
 
OP
OP
Marco B

Marco B

Subscriber
Joined
Jan 13, 2005
Messages
2,709
Location
The Netherla
Format
Multi Format
By the way, here is a nice 50x60cm (20x24") photo I made printed, toned and dried and succesfully flattened using this method, with the camera used to create it, next to it.

The drying itself was not the big thing to print this large, the lack of room in my darkroom was 😉
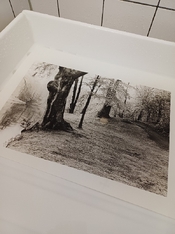
. Up to 40x50cm I can reasonably manage, but this size required putting the giant washing tray outside the home darkroom.
 

Attachments

  • 20250309_224051.jpg
    20250309_224051.jpg
    204.6 KB · Views: 25
OP
OP
Marco B

Marco B

Subscriber
Joined
Jan 13, 2005
Messages
2,709
Location
The Netherla
Format
Multi Format
I think that sulphide toners add a deeper sepia richness to the print. It also has an archival lifespan for eternity.

Ok,so something with the actual tones produced. As to archivability, the difference should be minimal, at least if you allow the thiourea to redevelop to completion.

Both toners in the end produce the same stable silversulphide.
 
Photrio.com contains affiliate links to products. We may receive a commission for purchases made through these links.
To read our full affiliate disclosure statement please click Here.

PHOTRIO PARTNERS EQUALLY FUNDING OUR COMMUNITY:


Ilford ADOX Freestyle Photographic Stearman Press Weldon Color Lab Blue Moon Camera & Machine
Top Bottom