Resource icon

Color Dye-Transfer Prints for the Modern Hobbyist - *Imbibition for For the People!*

Table Rock and the Chimneys

A
Table Rock and the Chimneys

  • 3
  • 0
  • 88
Jizo

D
Jizo

  • 3
  • 1
  • 78
Top Floor Fun

A
Top Floor Fun

  • 0
  • 0
  • 64
Sparrow

A
Sparrow

  • 3
  • 0
  • 80
Another Saturday.

A
Another Saturday.

  • 3
  • 0
  • 136

Recent Classifieds

Forum statistics

Threads
197,405
Messages
2,758,466
Members
99,488
Latest member
JKB
Recent bookmarks
0

holmburgers

Member
Joined
Aug 13, 2009
Messages
4,439
Location
Vienna, Austria
Format
Multi Format
holmburgers submitted a new resource:

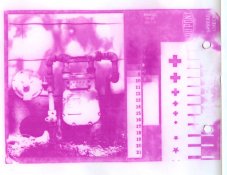
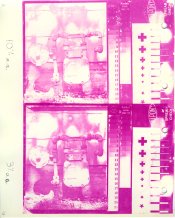
(there was a url link here which no longer exists) - Color Dye-Transfer Prints for the Modern Hobbyist - *Imbibition for For the People!*

HISTORY of the PROCESS

In 1994 Kodak discontinued the "Kodak Dye-Transfer Process". Since that time, only those who have hoarded those materials or have been enterprising enough to manufacture their own silver-halide matrix films (Jim Browning) have been able to make dye-transfer prints.

However, this is a curious & unfortunate state of affairs! The earliest dye-transfer (or dye imbibition) prints were made by exploiting the same mechanism that modern day carbon & gum...

(there was a url link here which no longer exists)
 
Last edited by a moderator:
OP
OP
holmburgers

holmburgers

Member
Joined
Aug 13, 2009
Messages
4,439
Location
Vienna, Austria
Format
Multi Format
Thanks michael!... now please.. put your hat back on.... hahaha.

You know, when I first heard about dye-transfer I had just set up my darkroom (about 2 years ago) and I honestly thought that I would never live to make a dye-transfer print after learning what is "necessary". It seems that most people doing the process are from a time when it was a commercial product for color photographs, and not an "alternative process" for art or experimentation. In all my perusing of modern information on dye-transfer, I never found any mention of this DCG method, which is very frustrating indeed. On the internet, I think there might only be 1 person who has ever proposed it, buried deep in the Yahoo! dye-transfer archives by Greg W. He recommends diazo sensitizers (screen printers use this stuff) and indeed, it's reasonable to assume that we might have difficulty obtaining dichromates in the future.

So, basically I see an opportunity for a completely new alternative process; one that is capable of producing high-quality color prints. In alt processes, this isn't really possible at the moment. Tri-color gum can't be considered "straight color printing", and the difficulty of color-carbon is very discouraging to the hobbyist.

When all the color papers have been discontinued, this might be the best way to make analog color prints into the 21st century & beyond. At least.. here's to hoping!
 
OP
OP
holmburgers

holmburgers

Member
Joined
Aug 13, 2009
Messages
4,439
Location
Vienna, Austria
Format
Multi Format
A Few Corrections & Ammendments

HISTORY

E. Sanger-Shepherd and O.M. Barlett were perhaps the 1st to propose the use of a relief matrix to produce dye-imbibition prints in 1902. US Patent #728,310

METHOD

One of Ives' most important contributions to the art, one that was used in all subsequent schemes, was the effect of the pH of the dye-bath on contrast. Since acid raises gelatin's affinity for the dye, lower pH will cause more dye to enter the matrix, thus, higher contrast will be obtained. To have 3 or 4 dye-solutions of each color, each with differing acid contents, would be an excellent method to have contrast control in the transferring stage. This is described in the British Journal of Photography, Vol 46 (1899), p. 409, 470 & 537.

Some of Ives' Patents are: USP1,106,816 & USP1,160,288, Ger.P.308030, Eng.P. 15823/13 & 15823/14, Fr.P. 463,737.

My explanation of why the dye transfers into the receiving paper might've been somewhat misleading The main reason for the transfer, according to Friedman, is that the matrix is necessarily very hard (tanned) comapared to the receiving sheet, which will have softer gelatin, and thus the migration.

The acid rinse after soaking the matrices in their dye baths should be a 10% solution of acetic acid, not 2%. This highly acidic bath will remove the excess dye on the matrix, but will cause the gelatin in the matrix to adhere tightly. The matrices can be left in this, registered if necessary, until ready for transfer. This prevents the possibility of them drying out between transfers.

A recommendation for testing textile dyes is a 2% dye solution in 5% acetic acid. However, this was for the purpose of making transparencies, so for prints the 2% concentration of dye could be reduced significantly.

Mat or Semi-Mat fixed out photo papers will work best as receiving papers.

A UV-restraining dye (yellow) has been added to matrices historically as standard practice to limit the depth of the relief. This might be something to explore in the future. Unfortunately, the K-dichromate stain is not sufficient to have a great affect, according to Friedman.

Lastly, if anyone is confused or needs clarification on something, it would be my pleasure to talk about it.
 

Photo Engineer

Subscriber
Joined
Apr 19, 2005
Messages
29,021
Location
Rochester, NY
Format
Multi Format
Two points to add here:

1. The matrix is exposed from the back! This causes the tanned image to begin forming at the surface of the film support for the purposes of adhesion. The yellow dye (tartrazine) is added to limit light penetration all the way to the surface thus confining the tanned gelatin image to be sharp and close to the support.

2. The best receiving material contains a mordant which attaches to the dye. It can often shift the dye hue by a considerable amount. The mordant used in Kodak's process was a Thorium salt and was slightly radioactive. It caused hue shifts that were slight but could be easily seen. I have seen a mordant shift a magenta dye to a good cyan dye upon attachment, but this is rare.

PE
 
OP
OP
holmburgers

holmburgers

Member
Joined
Aug 13, 2009
Messages
4,439
Location
Vienna, Austria
Format
Multi Format
Thanks PE,

I think I clearly stated that you expose through the base. Tartrazine would be an option for a light-restraining dye, but does it wash out or stay in the matrix? Tartrazine is actually suggested by Friedman as one of the textile dyes to use in the image transfer stage; so it would need to clear out of the matrix completely or would cause some problems I think. A yellow pigment might be an other option, and this could stay in the matrix indefinitely, as long as it didn't affect the dyes in some way.

For starters though, it's not necessary to complicate things with a light-restraining dye. First it will be necessary to see what can be done with a plain matrix, and only fix problems as they arise.

I've heard about this hue shift with Kodak's cyan dye and their mordant. I need to learn more about making receiving paper, but I can assure you I won't be using thorium! It will be interesting to see what affect a mordant might have on the dye-color, but again, we're talking about an incredibly sophisticated and complicated product by Kodak. The hobbyist need not concern himself with these matters, at the present.
 

Photo Engineer

Subscriber
Joined
Apr 19, 2005
Messages
29,021
Location
Rochester, NY
Format
Multi Format
Tartrazine washes out of the Matrix during processing. I don't know what the final yellow imaging dye was, but the conditions are different for dye the dye imbibition step and the transfer step so I don't think there would be a problem using tartrazine for two purposes.

You might want to check Jim Browning's work, as it may indicate problems with other receiving sheets without Thorium salts. A salt is needed for proper image stability. The dye must remain in the proper "matrix" for proper stability.

PE
 
OP
OP
holmburgers

holmburgers

Member
Joined
Aug 13, 2009
Messages
4,439
Location
Vienna, Austria
Format
Multi Format
Ok, well if the tartrazine washes out, it indeed could be a good light restrainer. It also might be suitable for imbibition itself, which would be nice because it is an easy dye to get a hold of. Afterall, you're ingesting it everytime you drink a mountain dew!

Again though, I don't want anyone to think that they need to worry about light-restraining dyes at the moment. Last night I exposed & etched 2 new plain gelatin matrices and did a quick and dirty transfer. Preliminary results are very promising and I will post an example soon.

As for mordants, I know that thorium is not the only option, unless you're specifically referring to the use of Kodak cyan, which yes will probably shift without it. Not a big deal though, because the whole point here is to find a new set of dyes that can be worked into a scheme for hobbyists.

Mordants are another thing for 'down the road', but I know for a fact that fixed-out photo papers will work, and indeed, plain gelatin would even work. The key issue is the "dye absorption index". If the receiver absorbs dye very easily, diffusion of the image will occur and you'll lose sharpness. If the receiver has low dye absorption, then contrast will suffer. Technicolor tested the absorption indices of their gelatin blanks (film strips) and categorized them into different classes so that depending on their separation negatives, whether they were too hard or too flat, they could match it up with a complementary blank to produce consistent, balanced prints
 

Photo Engineer

Subscriber
Joined
Apr 19, 2005
Messages
29,021
Location
Rochester, NY
Format
Multi Format
Your last paragraph is critical in understanding what is going on or what might go on. Without the proper mordant, you can even lose dye from the print back into the second or third matrix as you are doing transfers. There are a number of things that can go wrong without mordants, but you have touched on some of them.

As for the rest of it, I think it important to know what is going on in the real, perfected dye transfer process marketed by Kodak. If you don't a lot of things may get lost over the years. But, much of this is covered in Jim Browning's web site and I cannot stress the importance of his information enough.

PE
 
OP
OP
holmburgers

holmburgers

Member
Joined
Aug 13, 2009
Messages
4,439
Location
Vienna, Austria
Format
Multi Format
I agree with the importance of studying Kodak's scheme, and looking at Jim Browning's website. It would be interesting to see if we could get some of EKC's information regarding the sensitometry of their dyes and perhaps the formulation of their materials. From a history perspective, it would be very useful information.

Unless of course they have plans to bring back the product........(long pause).... HAH! :wink:

I guess some of my reluctance to acknowledge these issues at the moment stems from the fact that I've yet to see what the limitations of the simplest means are. I'd like to see what can be done with the least amount of effort, and then scale up from there. That's why I'm calling this imbibition for the people; although Jim Browning has done a noble and great thing by effectively "open sourcing" his whole production method, it's still beyond the scope of 99% of the people out there. I'd like to lure people into the idea that they too can create dye-transfer prints.

I see the major steps to success as this:

1) a good matrix formula and simple means for preparing it (check); with the possible addition of a light-restraining dye.

2) a good understanding of how different sensitizing concentrations will affect the contrast of the matrix, and in turn, how the pH of the dye bath can affect the contrast of the transfer. These are 2 very important controls, and I'm imagining there's a yet-understood 'Venn diagram' involving these two variables.

3) dyes and the appropriate dye solution (buffer). That Colton & Thronson paper gives a good idea of what's needed for a dye-solution.

4) receiving paper and mordant. Much in the same manner that we prepare carbon papers from Arches watercolor paper, and the like, I'm imagining a basic formula for hobbyists to create suitable papers.
 

Photo Engineer

Subscriber
Joined
Apr 19, 2005
Messages
29,021
Location
Rochester, NY
Format
Multi Format
There are examples of some of the issues in item #2 in the Kodak Dye Transfer book. There is information for #3 out there and info in the data book by EK again. Jim publishes some formulas as well.

PE
 
OP
OP
holmburgers

holmburgers

Member
Joined
Aug 13, 2009
Messages
4,439
Location
Vienna, Austria
Format
Multi Format
With #2 though, we have a brand new variable that Kodak never had; being able to affect the contrast of the matrix by changing sensitizer concentration.
 

Photo Engineer

Subscriber
Joined
Apr 19, 2005
Messages
29,021
Location
Rochester, NY
Format
Multi Format
In dye transfer there were at least 2 methods to increase contrast that immediately come to mind. One is to change the ratios of the A and B parts of the Matrix (tanning) developer to get at least 3 contrast grades if not more, and the other was to change the acid concentration in the post dye bath. I believe that there was a 3rd related to the use of Highlight Reducer.

Anyhow, there ya go!

PE
 
OP
OP
holmburgers

holmburgers

Member
Joined
Aug 13, 2009
Messages
4,439
Location
Vienna, Austria
Format
Multi Format
Ahh. damn... right again PE!

The highlight reducer is sodium hexametaphosphate I believe, but that's all I know about that.
 
OP
OP
holmburgers

holmburgers

Member
Joined
Aug 13, 2009
Messages
4,439
Location
Vienna, Austria
Format
Multi Format
A Few More Items:

First, my statement that "The earliest dye-transfer (or dye imbibition) prints were made by exploiting the same mechanism that modern day carbon & gum printers use" is possibly true, but slightly misleading. I think it's fair to say that silver-halide matrix films were utilized just as early.

Another important issue of 3-color assembly printing is registration. The typical answer to this question is to say, "go get some Condit Mfg. punches, film carriers and registration boards." Your response should then be, "honey, how about a 3rd mortgage?". Thanks, thank you... I'll be here all night...

But seriously, if and when such items appear on eBay, the prices are exorbitant. Not a sustainable solution!

F.E. Ives deals specifically with the issue of registration in his patent #1,121,187 (linked above). He proposes two solutions; 1 is to align visually, which he calls a perfectly satisfactory method. The novelty of his patent claim though, is in the use of a "separator" between the matrix and print to delay imbibition until registration is secured. This "separator" is nothing more than a thin layer of acidified water that is to be removed by going through a roller-press or squeegeed out. As you'll recall, an acid solution will keep the dye in the gelatin.

His 2nd solution is the more familiar registration board. It doesn't consist of pins, but rather you simply align the matrices, clip one edge so that they are all flush, and place it on a board with a corresponding edge to press the matrices against. Pretty basic...

My goal/plan is to use a simple 2-hole office punch and a simple registration board. Assuming we're at the point where we have 3 enlarged separation negatives, they must be registered visually on a light table. A special mark or insignia (like a star, asterisk, etc.) on the negatives will be very useful for this. Once they're registered, they are punched together. Likewise, the matrix blanks are punched before exposure, and each matrix & negative combo is placed in registration during exposure. Then, the final transfers are made on the same board.

Alternatively, if you don't want to punch your precious negatives (probably not a bad line of thought...), you could use a system where you tape another piece of plastic to the negative and punch that. I believe Andrea Zalme does something like this for her 3-color carbon stuff.

The other option is to align the dyed matrices in a 10% acetic acid bath, and just punch the matrices at that point.

So, in theory this should work well. The only special piece of equipment will be a home-made registration board. There are a number of manufacturers who sell custom-sized registration pins. These can be easily nailed (some have a hole in the center) or glued to a good piece of wood, MDF, etc., using a punched piece of film as a guide. Or, you can go to the hardware store and you'll be amazed at how many things might make good pins; these could be spun on a drill and sand-papered down if they're a little to big.
 

Neanderman

Member
Joined
Mar 22, 2004
Messages
565
Location
Ohio River Valley
Format
Large Format
If memory serves, triethanolamine was also useful for something -- I'm thinking it was used for contrast control during the dye stage, but it's been 30 years since I did any dyes and I could well be wrong...
 

Photo Engineer

Subscriber
Joined
Apr 19, 2005
Messages
29,021
Location
Rochester, NY
Format
Multi Format
The 3 hole office punch method works just fine. Use some like sized nails in a board on the registration surface to place the mats over for alignment. The cut edge method works well too. There is a description of alternate methods of alignment in the Kodak Dye Transfer Handbook. It is good reading for tips like this.

PE
 
OP
OP
holmburgers

holmburgers

Member
Joined
Aug 13, 2009
Messages
4,439
Location
Vienna, Austria
Format
Multi Format
I'm not sure about triethanolamine... doesn't ring any bells, but I don't have that many. . . (bells that is)

Thanks PE, I will definitely check that out. You say like sized nails, but I'm not sure if there are nails equal in size to the diameter of an office punch, which is about 6mm.

Visual registration, as easy as it sounds on paper, I think it would be diffucult; definitely an art. Have you ever done it? I know that it is not easy or fun with my screen-plate stuff, but those tolerances might be far less forgiving.

Going to the "dark side" to do a respectable test with Kodak magenta... will advise.
 
OP
OP
holmburgers

holmburgers

Member
Joined
Aug 13, 2009
Messages
4,439
Location
Vienna, Austria
Format
Multi Format
Kodak Magenta on Kodabromide (F-2)

Here is a test of Kodak magenta dye transferred to old fixed-out Kodabromide with an F-2 glossy surface.

The matrix was 6% gelatin, 1% sorbitol on melinex and brush-sensitized at 5% potassium-dichromate. The matrix was dry, so it was briefly pre-soaked in cool water, then added to the dye bath at 20° for 5 minutes. It was then rinsed in a 10% acetic acid bath*.

The Kodabromide was punched and soaked in cool water about 15 minutes prior to this, then squeegeed to the transferring board.

The actual "rolling" of the matrix was done with a squeegee, but I need to get a brayer or a print roller. Thought about a rolling pin...

You can see that there is bad transfer near the registration holes, this is due to my registration pins being inaccurately mounted, causing some buckling. (need to fix that)

All in all I'm pretty pleased, just looking at it. It's the best image I've gotten yet with a dye, but it definitely illustrates what needs improving.

* For one, the 10% a.a. rinse (Ive's recommendation) might have been excessively high, resulting in high contrast. Afterall, Kodak recommends 2 baths at 1%, adding acid in the 1st rinse to increase contrast.

It pays to read up :wink:

Ives speaks of the necessity for a 'tenuous' relief (read thin) in his patent that includes the claim for a light-restraining dye, a practice thereafter used in the industry. The relief needs to be thin to allow for flush contact between the matrix & transfer paper.

I think I will include some yellow food dye in the next batch of matrix gelatin. As PE says above, the dye is tartrazine and I'll bet that's what the majority of yellow food colorings use anyways.

Lastly, EK says that the quicker the print is dried, the sharper it is. I let this one air-dry after a wash in distilled water. Washing isn't recommended at all by Kodak, but it seems like you'd wanna wash the acid out?? IDK.

Ok.. well I think the next logical thing to do is repeat this exact procedure but with Kodak Dye-Transfer paper. That'll give some idea of what mordants can do.
 

Attachments

  • Kodak Magenta on Kodabromide - holmburgersAPUG.jpg
    Kodak Magenta on Kodabromide - holmburgersAPUG.jpg
    123.6 KB · Views: 261
OP
OP
holmburgers

holmburgers

Member
Joined
Aug 13, 2009
Messages
4,439
Location
Vienna, Austria
Format
Multi Format
Kodak Magenta on Kodak Dye-Transfer Paper

Here is the latest test with the Kodak magenta dye, and this time transferred onto "official" dye transfer paper (designed and mordanted to accept dye images). I did two transfers, one with a 10% acetic acid rinse and another with a 3% acetic acid rinse.

As you can see, the 3% is much, much better. Contrast has been improved in either case, and the sharpness is remarkably better than the fixed out Kodabromide.

I did the 3% transfer 2nd; placing the matrix into a warm water bath after the 1st transfer and then into a cool water bath, then back into the dye for about 4 minutes.

I can't tell if the increased density of the 3% transfer is due to an inconsistency in the dying, or virtue of the reduced acetic acid.

As you can see, the image has a lot of blemishes, and a few strange anomalies. This is due in large part to the operator.. err.. and the fact that I'm using a squeegee instead of a roller. It shows that chemistry is not the only thing at play here, technique is very important.

Going back to the test on Kodabromide paper, it should be noted that this was fixed in PhotoFormulary TF-5, which is a non-hardening fixer. I suspect that a hardening fixer would produce much better sharpness. However, I don't have a hardening fixer on hand, though I do have chrome alum. Any suggestions for a hardening bath?
 

Attachments

  • EK Magenta on DyeTrnsfr Paper 6-2.jpg
    EK Magenta on DyeTrnsfr Paper 6-2.jpg
    291.4 KB · Views: 223

Photo Engineer

Subscriber
Joined
Apr 19, 2005
Messages
29,021
Location
Rochester, NY
Format
Multi Format
The anomalies appear to be either air or water bubbles trapped under between the Mat and the paper. You have to roll firmly with a squeeegee roller to prevent this, and you must use a flat level surface.

PE
 
OP
OP
holmburgers

holmburgers

Member
Joined
Aug 13, 2009
Messages
4,439
Location
Vienna, Austria
Format
Multi Format
I think you're absolutely right!

During the 10 minute transfer, all I could think about was how terrible the "rolling" of the mat was. Fingers were crossed...

By the way, looking back at my first transfer with the kodak magenta, one which I did not post and with which there was no rinse at all after the dying, the dmax is very strong. So!, it seems that the less acid present in the rinse (or none at all) the greater the density. I guess this makes sense if you consider that the acid might heighten the matrices affinity for the dye..??
 

Dewey2

Member
Joined
Jun 3, 2011
Messages
21
Location
NYC
Format
35mm RF
I'm coming in late, but this is fun stuff. I worked in dye transfer for many years and ran one of the last standing dye labs in NYC (Tartaro Color).

I've read a lot of your posts, but haven't seen any mention of separation negs. Are you using digital negs or going old school? I know that pan masking and panchromatic lith film haven't been made for years, so if you are pursuing an analog method there are challenges.

Also, in your last post I see you're having trouble rolling prints. The Warren Condit Company (Sandy Hook, CT.) made print rollers with a weighted steel bar over the roller to reduce shimmy. Also, the matrix was anchored to the transfer slab with register pins (I didn't see any mention of this in the posts I've read) which adds additional rolling stability.
 
OP
OP
holmburgers

holmburgers

Member
Joined
Aug 13, 2009
Messages
4,439
Location
Vienna, Austria
Format
Multi Format
Hey Dewey2, awesome to have you join the fray. It'd be really interesting to hear more about your lab; history, technique, etc. When did you stop doing DT printing?

Separation negs are at this moment, on the backburner and these tests that you're seeing are just from a b&w negative. To be honest, I have kind of a convoluted scheme for separations. The biggest problem is the expense of large film, particularly panchromatic film. The cheapest option is to use X-ray film, which is made in large sizes and can be had for a song. This film is orthochromatic though.

So, that means there will have to be an intermediate step wherein I make the separations onto panchromatic film, 1:1, preferably by contact, but probably with a copy setup if I'm doing 35mm. If coming from a C-41 negative, then that's great; these separation positives can be projected onto the x-ray film. For E6 I'm planning to reversal process the panchromatic separations, and then project these onto the x-ray film.

Masking can then be achieved rather effortlessly since there will be 3 enlarged negatives. Creating a positive mask would only require contact printing onto another sheet of the x-ray film from the desired separation and reducing exposure or reducing density in farmer's reducer, for instance.

Now.... anyone in their right mind would probably use digital negs, but I'm gonna give this procedure a go and see what it can do.

I do plan to get a roller, though the Condit stuff is so expensive, I just can't justify the cost. A 12" Kodak print roller might be the next best option.

You can see the registration holes in the paper, but I need to clamp my registration board onto the table next time. I'm using a 2-hole office punch for that.
 

Dewey2

Member
Joined
Jun 3, 2011
Messages
21
Location
NYC
Format
35mm RF
My advice is to avoid making positives from a c-41 neg. It's strictly hit-and-miss with exposure and development. I think a fun first approach would be in-camera seps. Use 29, 61 and 47b Kodak gel filters on (ideally) a sheet film camera and shoot three exposures of a still subject. You'll develop the red and green about the same and the blue will need extra development. With sheet film you can process all 3 sheets at once in a tray. You clip one corner on the magenta neg and two corners on the yellow so you can ID them while processing in the dark. You can postmask the negs for highlights or for shadow detail or just go with them naked.

Contact print them on your matrix film and you can even roll them in register by eye. Lay down the yellow first, then magenta, then cyan. Use a mylar slip sheet and a lupe to register before applying roller pressure.

I had a dye lab in Houston and later moved to NYC to work for Frank Tartaro - something of a legend in the business. I think we rolled our last print in 1990, but prior to that we made prints for Robert Mapplethorpe, Avedon, Eggleston, Penn and a lot of boring ad stuff.

It's a beautiful and fascinating process, but honestly, I'm very impressed with where ink jet printing is at now. A dye took a full day to produce in a professional lab - an Epson takes 10 minutes and takes up a couple of square feet of real estate.
 
Photrio.com contains affiliate links to products. We may receive a commission for purchases made through these links.
To read our full affiliate disclosure statement please click Here.

PHOTRIO PARTNERS EQUALLY FUNDING OUR COMMUNITY:


Ilford ADOX Freestyle Photographic Stearman Press Weldon Color Lab Blue Moon Camera & Machine
Top Bottom