Kino
Subscriber
Nice!


I've been tinkering a bit on a few cameras lately with some successes and a few botched attempts.
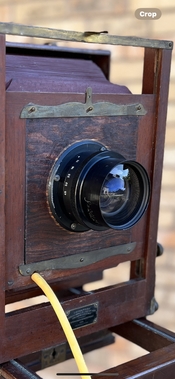
Even if it hardly qualifies as repair, today I am happy as I picked up an Isolette I in very good conditions (Jsolette, actually) with a solinar lens with stuck focus and managed to clean and put it back to work. Focus should be fine according to the ground glass used to align it - and the bellows seem surprisingly free of pinholes, though only a roll of film will tell on both the latter statements.

 www.photo.net
That is useful advice. Yes, GG and loupe, and yet there was a tiny bit of play before I could discern any change in focus so it is entirely likely that is somewhat off. It specifically sounds possible I regulated it beyond infinity.
Had a quick read at the links and I think I get it - I am not entirely sure why tweaking this way is done at infinity but this is something I am likely missing and I am happy to take it on faith.
This is good learning as I have a mamiya six on its way too...

Turns out that I did not remember that the mamiya achieve focus by moving the film plane rather than the front element, which is quite fancy and cool-looking, but should focus be a problem the technique above won't work
Still good for the isolette and will re-tune it this weekend!


Forgot to share the progress on the Graflex viewfinder repair. Meh. Good enough.


Yesterday, I finished cleaning up the pentaprism and am happy with the results. I forgot to get a before pic, but the picture below of the Canon FX viewfinder is near identical to what the FT was like when I got it. The bottom picture is the results using a lot of acetone to remove the old black finish, then respray with mirror type paint and then a coat of flat black.
Any particular brand of mirror paint that you use? I've got two Contax D cameras that have some deterioration to the mirror coating of the prism.
| Photrio.com contains affiliate links to products. We may receive a commission for purchases made through these links. To read our full affiliate disclosure statement please click Here. |
PHOTRIO PARTNERS EQUALLY FUNDING OUR COMMUNITY:  |