BradleyK
Member
Re-foamed a pair of Nikons (an F2AS and an F2w/DE1) with kits from Jon Goodman. So, two more cameras to rotate into use this year.


 ) Don't yo just love when you accidentally fix something?
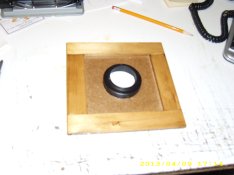
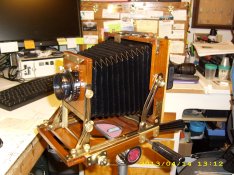
 No flange for the lens, it just threads directly into the lens board. All my fears about this type of mounting have been aliviated now that the lens is frozen in the board. On the plus side the front element which was frozen is now free thanks to efforts to remove the lens from the board. Guess the lens is now dedicated to the 2D until I decide to destroy the board.
Roger
View attachment 63258 View attachment 63259
I've got a couple of lenses mounted this way. (but not a 10"
That's a 19" Artar.
A little hard to read in the photo, but yes it's a 19".
Roger
Considering the many meanings of the English word "fix", I have been waiting for someone to post a reply such as "I really fixed my ex-wife today." Such posts would have improved what is essentially a rather boring thread.
| Photrio.com contains affiliate links to products. We may receive a commission for purchases made through these links. To read our full affiliate disclosure statement please click Here. |
PHOTRIO PARTNERS EQUALLY FUNDING OUR COMMUNITY:  |