Diffusion Transfer Printing ("Polaroid" peel-apart) recipes

Forum statistics

Threads
197,272
Messages
2,756,882
Members
99,445
Latest member
J-Dub
Recent bookmarks
6

richyd

Member
Joined
Jul 24, 2012
Messages
188
Location
London UK
Format
Medium Format
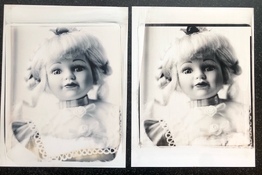
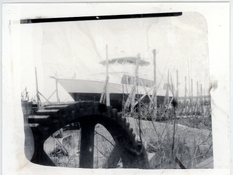
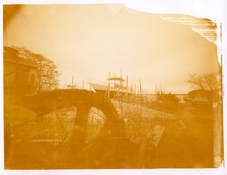
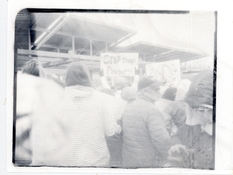
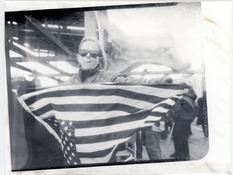
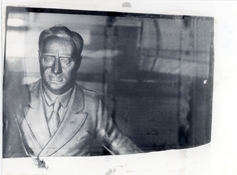
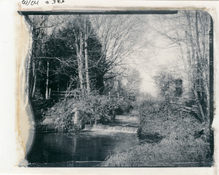
I like the compositions. You need to use more developer - it got a bit thin at the ends in the corners.

Yes, for these I did use less developer as I thought I was using too much before as the soaking pad at the end got very wet, so I'll return to previous.

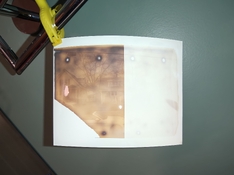
Re film leader, Post -It notes great idea , I keep on forgetting about that material for hacks. What I have done now is use a piece of plastic and a strip of very low tack masking tape. I'm going to make a pod sandwich out of thicker acetate sheet as the floppiness makes it tricky to keep everything in place and aligned. Must also remember to clean the top sheet after processing.
 

thinkbrown

Member
Joined
Mar 7, 2025
Messages
2
Location
Boston MA
Format
Analog
Well this thread certainly captured my imagination. I started experimenting with this method over the past few weeks and I'm finally starting to narrow in on a method that works for me.

I've included an image of my latest result. I'm using some heavily fogged 4x5 photo paper that I've fixed out as a receiver and Kodak min-r mammography film as the negative. I started with the developer 114 recipe listed at the beginning of the thread but found I needed about 3x the thiosulfate to get transfer.

Rather than using a laminator I'm using a polaroid 545 back for processing. I start by applying two "rails" of 2.5mil vinyl to the top and bottom of the receiver sheet. I then fold a sheet of letter paper in half and adhere the receiver down using the tabs of vinyl that extend beyond the paper. On top of the leading edge of the receiver I adhere a folded over piece of freezer paper that I dose the developer into. Finally, under safe light I place the negative on top and place another small piece of vinyl at the leading edge to hold it in place while I load it into the Polaroid back.

The rolling consistency of the Polaroid back seems quite good and the vinyl seems to ensure a nice thin layer of chemistry, the biggest struggle has been getting good transfers. Often I get a surprisingly good looking negative and zero transfer to the receiver paper.

1000005878.jpg
 
OP
OP

alecrmyers

Member
Joined
Sep 24, 2009
Messages
95
Format
Large Format
I'm using some heavily fogged 4x5 photo paper that I've fixed out as a receiver and Kodak min-r mammography film as the negative.
I found it very much harder to get dense positives using film stock; it was much easier with photo paper. You could try using paper negatives to see how that works (at about ISO 4).
 
OP
OP

alecrmyers

Member
Joined
Sep 24, 2009
Messages
95
Format
Large Format
I think I've found a way to reduce the streaking during development - left print in this example, compared to the right for example under the doll's left eye (both 8x10 negatives on 8.5x11 paper).
 

Attachments

  • FullSizeRender.jpeg
    FullSizeRender.jpeg
    184.6 KB · Views: 41

thinkbrown

Member
Joined
Mar 7, 2025
Messages
2
Location
Boston MA
Format
Analog
I found it very much harder to get dense positives using film stock; it was much easier with photo paper. You could try using paper negatives to see how that works (at about ISO 4).

I've had mixed results from using a paper negative. What I discovered today is that the amount of fog on the photo paper makes a huge difference in print density. I flashed half of this sheet with a Nikon speed light at 1/32 power and the difference in density is huge. (Ignore the weird spots, my rollers got gross on the previous attempt)

On the one hand I'd like to continue using this paper since I've got a case of like 500 sheets and it's too fogged for normal prints. On the other I'm starting to see the consistency advantage of coating purpose made receiver paper.
 

Attachments

  • 1000005932.jpg
    1000005932.jpg
    342.9 KB · Views: 20

OrientPoint

Subscriber
Joined
Jan 25, 2018
Messages
394
Location
New York
Format
35mm
I gave it another try this weekend. Results are below. I'm using @alecrmyers developer with Fuji HR-U green X-ray film. The statue image was metered for ISO 320, which seems to consistently work well. The outdoor shots were similarly exposed. The first outdoor shot one has a 90 second delay between exit from the laminator and peeling. Having read here that development is largely complete in about 10 seconds, I decided to peel the second one much sooner (about 20 seconds after exit) to see what would happen. Bad idea. The negatives look good, but the print is quite light, except for where the initial bead of developer was placed, which got significantly more time for transfer.

The sepia toned shot is using some dry Polaroid 803 revived with an older iteration of @alecrmyers developer paste intended for Ilford paper. It was shot at ISO 800 (box speed for 803) and run through the regular Polaroid processor. The older developer oxidizes within a few minutes of processing and leaves a thick red layer on the print that is easily washed off. I haven't tried the newer X-ray film developer with Polaroid.

I need to start making my own materials. This is a lot of fun, and I've already blown through the paper I was sent!
 

Attachments

  • shipyard.jpg
    shipyard.jpg
    1.6 MB · Views: 31
  • shipyard_803.jpg
    shipyard_803.jpg
    1.7 MB · Views: 26
  • protest_2.jpg
    protest_2.jpg
    1.3 MB · Views: 32
  • protest_1.jpg
    protest_1.jpg
    1.6 MB · Views: 32
  • fdr_1.jpg
    fdr_1.jpg
    1.6 MB · Views: 34
OP
OP

alecrmyers

Member
Joined
Sep 24, 2009
Messages
95
Format
Large Format
Having read here that development is largely complete in about 10 seconds, I decided to peel the second one much sooner (about 20 seconds after exit) to see what would happen. Bad idea. The negatives look good, but the print is quite light, except for where the initial bead of developer was placed, which got significantly more time for transfer.
Development of the film is complete in a few seconds but transfer isn't.

How fast does your laminator run? perhaps you could time from the start to the point it releases the envelope, and let me know?

Thank you for posting the pictures.
 

OrientPoint

Subscriber
Joined
Jan 25, 2018
Messages
394
Location
New York
Format
35mm
The laminator takes 50 seconds from insertion of the envelope to release. This is the same $20 laminator you have, I believe.
 
OP
OP

alecrmyers

Member
Joined
Sep 24, 2009
Messages
95
Format
Large Format
My laminator although not actually the same one as yours still runs at about the same speed and I don’t have to wait any time at all before peeling, not even with the 8x10, the end of which has much less time to transfer than the start. I’m not sure why there should be a difference though.
 

OrientPoint

Subscriber
Joined
Jan 25, 2018
Messages
394
Location
New York
Format
35mm
Odd. The prints with better density were all left sitting for 90 seconds after coming out of the laminator. That doesn't mean they needed all 90 seconds of course, but they definitely needed more time. The box of HR-U I'm using currently has been sitting around for a few (~4) years. Negatives do look ok, but maybe age has an impact? I should have tried a fresh box (I have one).
 

richyd

Member
Joined
Jul 24, 2012
Messages
188
Location
London UK
Format
Medium Format
Made another exposure this time using more developer (too much). Print and negative came out well. I would say that the print is slightly more yellow than previous ones.

Examining the two previous exposures I made, I noticed that the last half of the print and negative were partly solarised. At first I thought it was because I switched on the light straight after processing but on reading that development takes place in seconds, not so sure. Anyhow for this last print I waited another 30 secs (good time to clean up excess developer) before peeling open in light.
 

Attachments

  • DTP07pos.jpg
    DTP07pos.jpg
    666.8 KB · Views: 36
  • DTP07neg50.jpg
    DTP07neg50.jpg
    646.1 KB · Views: 38

Peter Schrager

Subscriber
Joined
Jul 19, 2004
Messages
4,042
Location
fairfield co
Format
Large Format
Made another exposure this time using more developer (too much). Print and negative came out well. I would say that the print is slightly more yellow than previous ones.

Examining the two previous exposures I made, I noticed that the last half of the print and negative were partly solarised. At first I thought it was because I switched on the light straight after processing but on reading that development takes place in seconds, not so sure. Anyhow for this last print I waited another 30 secs (good time to clean up excess developer) before peeling open in light.

Are you using film paper or xray??
Photo #2 is delicious !!
 

Peter Schrager

Subscriber
Joined
Jul 19, 2004
Messages
4,042
Location
fairfield co
Format
Large Format
I want to know how to get ahold of zinc nitrate hexahydrate. when I google the product it tells me that they will only sell to schools or a business...I'm neither.....any help here as I'm awestruck by this thread and am so looking forward to trying this. Big thank you Alex and anyone else who has so far contributed
 
OP
OP

alecrmyers

Member
Joined
Sep 24, 2009
Messages
95
Format
Large Format
you can get zinc nitrate on Snapclik, or use zinc sulphate from Etsy. However I would work with palladium chloride or sodium- potassium- or ammonium tetrachloropalladate instead, at this point. I will try to produce a suggestion for palladium salts and sodium sulphide (to prep PdS), since I don’t think I wrote one up. PdS is what the more modern (late 50’s and on) Polaroid products use.


Alternatively, silver nitrate is easy to get. And you could make your particles with a led blacklight flashlight (haven’t tried it but should work :smile: )

What are you proposing to use as the binder?
 
Last edited:

Peter Schrager

Subscriber
Joined
Jul 19, 2004
Messages
4,042
Location
fairfield co
Format
Large Format
you got me all confused here...the zinc nitrate is for the receiver paper...right??
by binder you mean the developer..yes?? #127
I had already ordered the chems for the zinc formula but really no big deal as I already had most of the chems in house.
If you insist I will go with the palladium salts
this recipe
rockwool 1og
palladium chloride o.5g 0.1% palladium
sodium borohydride 15mg
PS201 drop
if you have a better one let us know!!
 
OP
OP

alecrmyers

Member
Joined
Sep 24, 2009
Messages
95
Format
Large Format
Yes, the receiver paper. So your binder is the silica suspension. It binds the metallic particles to the paper.
 
Joined
Nov 20, 2020
Messages
86
Location
Western Massachusetts
Format
8x10 Format
IMG_8450-2.jpg
IMG_8446-2.jpg

I've been using the palladium silica paper recipe and developer 140, and am now getting some very nice results.

Some things I've discovered:

Fogging the light sensitive paper significantly leads to better contrast and better black density. Contrast I understand, but why would adding exposure make the blacks darker?

Receiver paper batches are sometimes neutral and sometimes warm, and I have yet to figure out what causes the difference.

The panchromatic film I have (Agfa Aviphot Pan 200) produces very faint images.

Things I plan on doing next:

Making some of developer 143, to see if I can get it to work with the agfa film.

I'm also curious if platinum nanoparticles would work for a silica paper. Platinum produces more neutral prints compared to palladium when making traditional platinum palladium prints, maybe that will apply here?


If any of you have advice on how to get film with less silver to produce nice dark prints, I would greatly appreciate it. My next thought is to try fogging the film as I did with the paper, as well as try developer 143 instead of 140.
 

MsErinD

Member
Joined
Apr 8, 2025
Messages
2
Location
California
Format
Analog
This is where we stand. I have a good chemistry that produces clean good contrast well toned b&w prints. I'd like some other people to try it.

Are there any volunteers to whom I could send some materials to see how this works in other people's hands? I will send the film, paper and developer, but you need to have a 4x5 camera, and a laminator (something like this: https://www.amazon.com/Laminator-Crenova-Thermal-Laminating-Pouches/dp/B08P3B8DSC/ - which, at $20 is almost less than the cost of my postage to send you the materials.)

This isn't a gift - you have to commit to trying several (not just one!) exposures and post or send me the results. Please don't try it once and then go silent, or tell me you'll get around to it "sometime" - that doesn't help anyone and I want to push this forward.

If you're genuinely willing to help and you actually have the spare time to do so, message me.

I would love to try it if youre still looking for volunteers
 
OP
OP

alecrmyers

Member
Joined
Sep 24, 2009
Messages
95
Format
Large Format
Platinum nanoparticles will work; so do silver ones. Getting neutral tones is the issue; I don't think it's as simple as what metal you use, more about the size distribution of the particles which affects the size distribution of silver particles, which sets their colour. I have dozens of recipes for paper that produce a deep red/brown image with yellow hilights. With palladium. For instance, just by changing the supplier of silica. I also have hundreds of dollars of different mercapto- toning agents without finding one that works reliably. Yet. Image tone and how to control it is a thread that runs through forty years of patent literature.

>The panchromatic film I have (Agfa Aviphot Pan 200) produces very faint images.

That is the issue to be solved with film; I have one solution but I don't want to blunt your creativity.

>Fogging the light sensitive paper significantly leads to better contrast and better black density. Contrast I understand, but why would adding exposure make the blacks darker?

Photo paper is a great start but in terms of chemistry it's - figuratively - full of specialized toners and sensitizers that I guarantee are getting involved in the transfer process. So it's very hard to say what's going on.

If you're using recipe 140 and 143, can you share where you get the DEHA from, by the way?

Those are exceptional pictures to demonstrate a new/old process by the way. Thank you for sharing them.
 
Last edited:
Joined
Nov 20, 2020
Messages
86
Location
Western Massachusetts
Format
8x10 Format
Platinum nanoparticles will work; so do silver ones. Getting neutral tones is the issue; I don't think it's as simple as what metal you use, more about the size distribution of the particles which affects the size distribution of silver particles, which sets their colour.

>The panchromatic film I have (Agfa Aviphot Pan 200) produces very faint images.

That is the issue to be solved with film; I have one solution but I don't want to blunt your creativity.

I'll do some experiments and if they all end up duds I'll come back begging for your solution!
 
Joined
Nov 20, 2020
Messages
86
Location
Western Massachusetts
Format
8x10 Format
Platinum nanoparticles will work; so do silver ones. Getting neutral tones is the issue; I don't think it's as simple as what metal you use, more about the size distribution of the particles which affects the size distribution of silver particles, which sets their colour. I have dozens of recipes for paper that produce a deep red/brown image with yellow hilights. Image tone and how to control it is a thread that runs through forty years of patent literature.

>The panchromatic film I have (Agfa Aviphot Pan 200) produces very faint images.

That is the issue to be solved with film; I have one solution but I don't want to blunt your creativity.

Those are exceptional pictures to demonstrate a new/old process by the way. Thank you for sharing them.

I want to make sure I understand the chemical reactions properly. Is the image is formed by silver which is deposited from the film onto the receiver paper, or of the palladium in the receiver paper?
 
OP
OP

alecrmyers

Member
Joined
Sep 24, 2009
Messages
95
Format
Large Format
I want to make sure I understand the chemical reactions properly. Is the image is formed by silver which is deposited from the film onto the receiver paper, or of the palladium in the receiver paper?

The 30 second lesson on chemistry is that the developer gel contains both a developer and a silver solvent - it's essentially a traditional monobath, adjusted for this process. In two competing reactions the developer reduces the exposed silver halide grains to metallic silver in place, while the solvent dissolves the unexposed grains. The solvent-silver-halide complex diffuses in the gel across to the receiver sheet where the nuclei (of metal, or metal sulphide, or something else) cause/permit the halide to be reduced at that site and deposited as metallic silver.

In case anyone is wondering, the use of the word nucleus in this subject is not the same as an "atomic nucleus". We are talking about the nucleus - the core - of a potential grain of silver. A 30nm nucleus of silver still contains 10^10 atoms.

Metallic silver can take on a variety of different hues depending on particle size - the yellow tones that you get are the same thing as "Carey Lea silver". In that case the particles are about 1/10 of the wavelength of light so the colour effects are not a simple matter.

The amount of palladium, platinum or other metal that you need in the paper is much much smaller than you would need to form an image by itself - the actual image is the silver from the photosensitive material.
 
Last edited:
Joined
Nov 20, 2020
Messages
86
Location
Western Massachusetts
Format
8x10 Format
I’m thinking of possible ways to get more metal onto the receiver paper than is present in the film.

When the unexposed silver bromide from the film is reduced to silver nano particles, excess bromine will be released

Based on what I’ve read, the excess bromine will react with the uracil to form 5-bromouracil.

If there is silver nitrate in the reagent, it will react with 5-bromouracil to form a new silver bromide salt.

These new silver bromides could then be reduced in the same manner as the original ones present in the film.

One possible issues I can think of is the presence of excess sodium borohydride in the receiver paper which could reduce the silver nitrate to nano particles everywhere.

I believe I will have to make a dilute solution of sodium borohydride, so that I may accurately add just enough of it to the receiver paper coating to reduce the palladium chloride and no more.

The amount of silver nitrate and uracil whch will need to be added in order make this work will depend on the amount of silver bromide present in the negative film, so if it works (I’ll hopefully test it soon) the formula will likely have to change depending on what negative material is used.
 
OP
OP

alecrmyers

Member
Joined
Sep 24, 2009
Messages
95
Format
Large Format
I’m thinking of possible ways to get more metal onto the receiver paper than is present in the film.
Those are some interesting ideas. There’s actually more than enough silver in a regular film to give a black print - but as you’ve noticed, it’s not always easy to get it to the right place. Looking forward to hearing about your results!
 
Photrio.com contains affiliate links to products. We may receive a commission for purchases made through these links.
To read our full affiliate disclosure statement please click Here.

PHOTRIO PARTNERS EQUALLY FUNDING OUR COMMUNITY:


Ilford ADOX Freestyle Photographic Stearman Press Weldon Color Lab Blue Moon Camera & Machine
Top Bottom