Diffusion Transfer Printing ("Polaroid" peel-apart) recipes

Protest.

A
Protest.

  • 3
  • 2
  • 83
Window

A
Window

  • 3
  • 0
  • 54
_DSC3444B.JPG

D
_DSC3444B.JPG

  • 0
  • 1
  • 84
20250405_094841.jpg

D
20250405_094841.jpg

  • 4
  • 0
  • 98

Recent Classifieds

Forum statistics

Threads
197,199
Messages
2,755,490
Members
99,423
Latest member
Sykopics
Recent bookmarks
0

richyd

Member
Joined
Jul 24, 2012
Messages
184
Location
London UK
Format
Medium Format
I like the compositions. You need to use more developer - it got a bit thin at the ends in the corners.

Yes, for these I did use less developer as I thought I was using too much before as the soaking pad at the end got very wet, so I'll return to previous.

Re film leader, Post -It notes great idea , I keep on forgetting about that material for hacks. What I have done now is use a piece of plastic and a strip of very low tack masking tape. I'm going to make a pod sandwich out of thicker acetate sheet as the floppiness makes it tricky to keep everything in place and aligned. Must also remember to clean the top sheet after processing.
 

thinkbrown

Member
Joined
Mar 7, 2025
Messages
2
Location
Boston MA
Format
Analog
Well this thread certainly captured my imagination. I started experimenting with this method over the past few weeks and I'm finally starting to narrow in on a method that works for me.

I've included an image of my latest result. I'm using some heavily fogged 4x5 photo paper that I've fixed out as a receiver and Kodak min-r mammography film as the negative. I started with the developer 114 recipe listed at the beginning of the thread but found I needed about 3x the thiosulfate to get transfer.

Rather than using a laminator I'm using a polaroid 545 back for processing. I start by applying two "rails" of 2.5mil vinyl to the top and bottom of the receiver sheet. I then fold a sheet of letter paper in half and adhere the receiver down using the tabs of vinyl that extend beyond the paper. On top of the leading edge of the receiver I adhere a folded over piece of freezer paper that I dose the developer into. Finally, under safe light I place the negative on top and place another small piece of vinyl at the leading edge to hold it in place while I load it into the Polaroid back.

The rolling consistency of the Polaroid back seems quite good and the vinyl seems to ensure a nice thin layer of chemistry, the biggest struggle has been getting good transfers. Often I get a surprisingly good looking negative and zero transfer to the receiver paper.

1000005878.jpg
 
OP
OP

alecrmyers

Member
Joined
Sep 24, 2009
Messages
85
Format
Large Format
I'm using some heavily fogged 4x5 photo paper that I've fixed out as a receiver and Kodak min-r mammography film as the negative.
I found it very much harder to get dense positives using film stock; it was much easier with photo paper. You could try using paper negatives to see how that works (at about ISO 4).
 
OP
OP

alecrmyers

Member
Joined
Sep 24, 2009
Messages
85
Format
Large Format
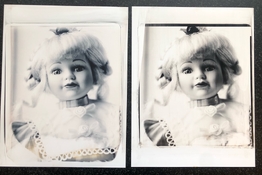
I think I've found a way to reduce the streaking during development - left print in this example, compared to the right for example under the doll's left eye (both 8x10 negatives on 8.5x11 paper).
 

Attachments

  • FullSizeRender.jpeg
    FullSizeRender.jpeg
    184.6 KB · Views: 32

thinkbrown

Member
Joined
Mar 7, 2025
Messages
2
Location
Boston MA
Format
Analog
I found it very much harder to get dense positives using film stock; it was much easier with photo paper. You could try using paper negatives to see how that works (at about ISO 4).

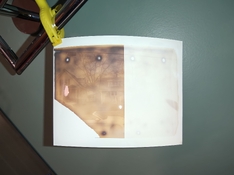
I've had mixed results from using a paper negative. What I discovered today is that the amount of fog on the photo paper makes a huge difference in print density. I flashed half of this sheet with a Nikon speed light at 1/32 power and the difference in density is huge. (Ignore the weird spots, my rollers got gross on the previous attempt)

On the one hand I'd like to continue using this paper since I've got a case of like 500 sheets and it's too fogged for normal prints. On the other I'm starting to see the consistency advantage of coating purpose made receiver paper.
 

Attachments

  • 1000005932.jpg
    1000005932.jpg
    342.9 KB · Views: 12

OrientPoint

Subscriber
Joined
Jan 25, 2018
Messages
389
Location
New York
Format
35mm
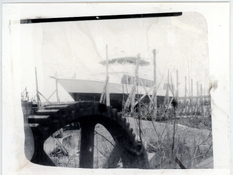
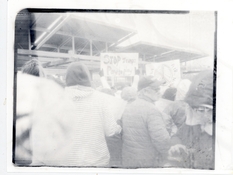
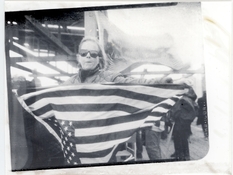
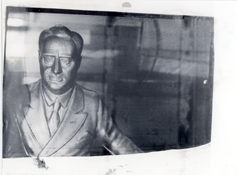
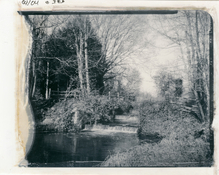
I gave it another try this weekend. Results are below. I'm using @alecrmyers developer with Fuji HR-U green X-ray film. The statue image was metered for ISO 320, which seems to consistently work well. The outdoor shots were similarly exposed. The first outdoor shot one has a 90 second delay between exit from the laminator and peeling. Having read here that development is largely complete in about 10 seconds, I decided to peel the second one much sooner (about 20 seconds after exit) to see what would happen. Bad idea. The negatives look good, but the print is quite light, except for where the initial bead of developer was placed, which got significantly more time for transfer.

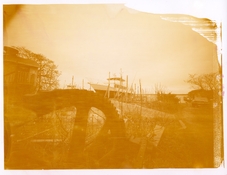
The sepia toned shot is using some dry Polaroid 803 revived with an older iteration of @alecrmyers developer paste intended for Ilford paper. It was shot at ISO 800 (box speed for 803) and run through the regular Polaroid processor. The older developer oxidizes within a few minutes of processing and leaves a thick red layer on the print that is easily washed off. I haven't tried the newer X-ray film developer with Polaroid.

I need to start making my own materials. This is a lot of fun, and I've already blown through the paper I was sent!
 

Attachments

  • shipyard.jpg
    shipyard.jpg
    1.6 MB · Views: 23
  • shipyard_803.jpg
    shipyard_803.jpg
    1.7 MB · Views: 19
  • protest_2.jpg
    protest_2.jpg
    1.3 MB · Views: 23
  • protest_1.jpg
    protest_1.jpg
    1.6 MB · Views: 23
  • fdr_1.jpg
    fdr_1.jpg
    1.6 MB · Views: 24
OP
OP

alecrmyers

Member
Joined
Sep 24, 2009
Messages
85
Format
Large Format
Having read here that development is largely complete in about 10 seconds, I decided to peel the second one much sooner (about 20 seconds after exit) to see what would happen. Bad idea. The negatives look good, but the print is quite light, except for where the initial bead of developer was placed, which got significantly more time for transfer.
Development of the film is complete in a few seconds but transfer isn't.

How fast does your laminator run? perhaps you could time from the start to the point it releases the envelope, and let me know?

Thank you for posting the pictures.
 
OP
OP

alecrmyers

Member
Joined
Sep 24, 2009
Messages
85
Format
Large Format
My laminator although not actually the same one as yours still runs at about the same speed and I don’t have to wait any time at all before peeling, not even with the 8x10, the end of which has much less time to transfer than the start. I’m not sure why there should be a difference though.
 

OrientPoint

Subscriber
Joined
Jan 25, 2018
Messages
389
Location
New York
Format
35mm
Odd. The prints with better density were all left sitting for 90 seconds after coming out of the laminator. That doesn't mean they needed all 90 seconds of course, but they definitely needed more time. The box of HR-U I'm using currently has been sitting around for a few (~4) years. Negatives do look ok, but maybe age has an impact? I should have tried a fresh box (I have one).
 

richyd

Member
Joined
Jul 24, 2012
Messages
184
Location
London UK
Format
Medium Format
Made another exposure this time using more developer (too much). Print and negative came out well. I would say that the print is slightly more yellow than previous ones.

Examining the two previous exposures I made, I noticed that the last half of the print and negative were partly solarised. At first I thought it was because I switched on the light straight after processing but on reading that development takes place in seconds, not so sure. Anyhow for this last print I waited another 30 secs (good time to clean up excess developer) before peeling open in light.
 

Attachments

  • DTP07pos.jpg
    DTP07pos.jpg
    666.8 KB · Views: 11
  • DTP07neg50.jpg
    DTP07neg50.jpg
    646.1 KB · Views: 11

Peter Schrager

Subscriber
Joined
Jul 19, 2004
Messages
4,036
Location
fairfield co
Format
Large Format
Made another exposure this time using more developer (too much). Print and negative came out well. I would say that the print is slightly more yellow than previous ones.

Examining the two previous exposures I made, I noticed that the last half of the print and negative were partly solarised. At first I thought it was because I switched on the light straight after processing but on reading that development takes place in seconds, not so sure. Anyhow for this last print I waited another 30 secs (good time to clean up excess developer) before peeling open in light.

Are you using film paper or xray??
Photo #2 is delicious !!
 
Photrio.com contains affiliate links to products. We may receive a commission for purchases made through these links.
To read our full affiliate disclosure statement please click Here.

PHOTRIO PARTNERS EQUALLY FUNDING OUR COMMUNITY:


Ilford ADOX Freestyle Photographic Stearman Press Weldon Color Lab Blue Moon Camera & Machine
Top Bottom