I've been away from the repair bench for a week or so while I was finishing up my darkroom. Now that it's functional, I'll be investigating shutter capping issues on an old Canon FT. I've lubed what I can see without major disassembly and let it set for a couple of weeks to allow the tiny bit of lube to migrate but it still visibly caps. I may try to adjust the shutter tension next. For those that have had success by adjusting tension, how much was required? Do you adjust a half turn at a time or does it need more typically? Also, after a shutter tension adjustment, have you seen a difference in shutter speeds?


- Home
- Forums
- Analog Workflow Forums (100% Analog/Traditional)
- Analog Equipment
- Camera Building, Repairs & Modification
You are using an out of date browser. It may not display this or other websites correctly.
You should upgrade or use an alternative browser.
You should upgrade or use an alternative browser.
What did you fix today? (part 2)
-
A
- Thread starter Sean
- Start date


Recent Classifieds
-
Want to Buy Sekonic L208
- Started by RoboRepublic
-
For Sale Plaubel Peco rail 4x5
- Started by Gaston 012
-
Want to Buy Jobo Expert 3006
- Started by OlliJ
Forum statistics
Helios 1984
Member
That's a great solution. Elegant even
I made the sleeve out of some brass spacer tube salvaged from a long gone Pentax lens. It measure 3mm OD, 2mm ID, and a tad under 2mm in height. It’s so small that, for a moment, I lost it inside a ziplock bag

————————————
Yesterday, I’ve attempted to adjust the shutter speeds of the MG-S as they are way off but couldn’t get them anywhere near tolerances. I’ll try replacing the pulley cords, I have a spool of industrial Cansew heavy duty nylon thread that will do nicely.
Last edited:
This time a old Seagull 4A was given to me and give a try. It is not at good condition since it was found in a old garage with water leak. The box and papers that comes with it has lost and the film next to it has turned into pieces...
There are are many rust on the body, and also inside. Screws are also rust and there is no other way but drilled out.
I started with the shutter first, and the inside is not good. Most iron parts are rusted.


The shutter seems ok, but the slow speed is not working. It is locked by the last catch at the end.
The screw was tight and it was bounded with the catch. I used hammer to knock it out and saw the rust inside. Besides the brass holder seems thicker than usual so I used fine needle file to reshape and smooth out the interior.
Then with a few drops of added light oil (RC models bearing oil) it work again.

I still haven't decided what to deal with the rust.
There are are many rust on the body, and also inside. Screws are also rust and there is no other way but drilled out.
I started with the shutter first, and the inside is not good. Most iron parts are rusted.
The shutter seems ok, but the slow speed is not working. It is locked by the last catch at the end.
The screw was tight and it was bounded with the catch. I used hammer to knock it out and saw the rust inside. Besides the brass holder seems thicker than usual so I used fine needle file to reshape and smooth out the interior.
Then with a few drops of added light oil (RC models bearing oil) it work again.
I still haven't decided what to deal with the rust.
Kino
Subscriber
I don't know if Evapo-rust is available in your country, but they make a gel based version that can be brushed on and wiped off.

 www.evapo-rust.com
If you cannot purchase this product; check out this homemade rust remover made with EDTA and Citric Acid:
Remove Rust from Large Items & Verticals | Evapo-Rust® Gel
Evapo-Rust® Gel is great when you have to remove rust from large items that can't be dipped, and vertical surfaces that the gel can stick to.
www.evapo-rust.com
If you cannot purchase this product; check out this homemade rust remover made with EDTA and Citric Acid:
Kino
Subscriber
New light seals courtesy of Jon Goodman for a Nikon F3 and EL Nikkormat.

forest bagger
Subscriber
Here is my attempt to repair a Nikon FA:


This FA has the strange error that the manual exposure times were formed correctly and also displayed in the viewfinder display, but in the A position the display changed to HI after fractions of a second.
After removing the top cover the error was gone!
I found some yellow NIKON adhesive strips stuck over the electronics under the top cover, so I suspected a short circuit against the metal of the top cover because of holes in the NIKON adhesive strips and replaced them with this green rubber blanket.
But that changed nothing - without the top cover the FA did everything correctly, with the top cover mounted the HI error occurred again.
I noticed, that the top cover pressed the electronics a bit down to the body, so there is no short circuit between top cover an body but some short circuit (or breaking connection?) inbetween the flex print layers of the electronics.
How can I find this out?
I am bit out of my mind today. My nephew said his lens "fell out from the lens" and " he doesn't know what to do".
Then I received a package of this

Should I consider it is a Lego without manual???
Should I just order a new Rollei HFT Planar to him instead???
Then I received a package of this
Should I consider it is a Lego without manual???
Should I just order a new Rollei HFT Planar to him instead???
Kino
Subscriber
I am bit out of my mind today. My nephew said his lens "fell out from the lens" and " he doesn't know what to do".
Then I received a package of this
Should I consider it is a Lego without manual???
Should I just order a new Rollei HFT Planar to him instead???

Helios 1984
Member
Abstract art
mshchem
Subscriber
Snow plow knocked my mail box off the post. Had it back ready to go in a half hour.
Without any idea how this is gonna to assemble I spent a lot in figuring out how all parts connected and not it's fixed 
I am very exhausted.
This is the inside views of QBM Plannar 50/1.8 (Singapore)

Above: this how focusing barrels assembled
Below: with the aperture ring and gears

The bar that keeping the lens in position during focusing (moving in /out) as 2 thin washers
You can pre-install in on the holder ring and later adjust the position

I missed a picture, which is the holder that secure all these lower parts.
It has 3 screws : 2 short, 1 long . The long screw also act as the infinity stop.
A small metal ball is there for the aperture setting clicks .
The hardest part is the trigger lever on that holder. The pink's lever has to be inserted into the trigger. Then slide in the spring into the longer pin and make them in position.

Then just put back the silver ring ( with a spring inside) and the tip connect to the aperture ring.
Just put back the lock ring and screws for the mount and done.
The focusing adjustment is done from the front .
Btw, how much should I charge my nephew?
I am very exhausted.
This is the inside views of QBM Plannar 50/1.8 (Singapore)
Above: this how focusing barrels assembled
Below: with the aperture ring and gears
The bar that keeping the lens in position during focusing (moving in /out) as 2 thin washers
You can pre-install in on the holder ring and later adjust the position
I missed a picture, which is the holder that secure all these lower parts.
It has 3 screws : 2 short, 1 long . The long screw also act as the infinity stop.
A small metal ball is there for the aperture setting clicks .
The hardest part is the trigger lever on that holder. The pink's lever has to be inserted into the trigger. Then slide in the spring into the longer pin and make them in position.
Then just put back the silver ring ( with a spring inside) and the tip connect to the aperture ring.
Just put back the lock ring and screws for the mount and done.
The focusing adjustment is done from the front .
Btw, how much should I charge my nephew?
Kino
Subscriber
Btw, how much should I charge my nephew?
Surely you need your windows washed and a garden weeded?
Surely you need your windows washed and a garden weeded?
Or your cel phone set up to do what you want it to do for you
.Mr Flibble
Member
Finally got around to finishing up that Graflex outfit case I posted about a few pages ago.
Got a can of matching Olive Drab paint to touch up the spots I couldn't get to with the spray can.
Clean out the inside and replaced the crusty old felt padding at the bottom.
Then I fashioned the two brackets the Speed Graphic camera rests on.
Time to collect the rest of the outfit that's supposed to go into the case....buying another 3-Cell flash synchronizer is going to be *fun*
This time a old Seagull 4A was given to me and give a try. It is not at good condition since it was found in a old garage with water leak. The box and papers that comes with it has lost and the film next to it has turned into pieces...
There are are many rust on the body, and also inside. Screws are also rust and there is no other way but drilled out.
I started with the shutter first, and the inside is not good. Most iron parts are rusted.
View attachment 359389
View attachment 359388
View attachment 359390
The shutter seems ok, but the slow speed is not working. It is locked by the last catch at the end.
The screw was tight and it was bounded with the catch. I used hammer to knock it out and saw the rust inside. Besides the brass holder seems thicker than usual so I used fine needle file to reshape and smooth out the interior.
Then with a few drops of added light oil (RC models bearing oil) it work again.
View attachment 359391
I still haven't decided what to deal with the rust.
I've seen good results for rusted parts using an ultrasonic cleaner and a solution called Evaporust. Something like 20 minutes at about 120F cleaned some piano bench parts quite well.


I've seen good results for rusted parts using an ultrasonic cleaner and a solution called Evaporust. Something like 20 minutes at about 120F cleaned some piano bench parts quite well.
Thanks . But I think this one seems more suitable for me . It is from japan, easier to ship to my place.
Engineer Neji-Saurus Screw Removal Pliers Liquid Rust Remover ZC-28
I just put the Seagull down here and thinking whether I should continue. It has more problems than I could think of, like , the tensioning mechanics works right when the focus was set to infininty or the nearest, but it loose the function when it was set inbetween.
Roger Thoms
Subscriber
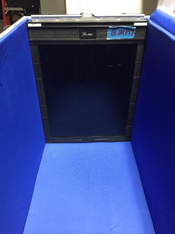
I repurposed a Leitz slide projector case to hold 8x10 film holders using some nylon pack cloth and one of my Wife’s “Pilates” mats which she graciously donated to the project. The case came with some film holders I bought a while back and while it did work for the carrying the holders, it still had the internal dividers for the slide projector. So I removed the dividers, added some additional padding and lined it with the nylon pack cloth. Also many thanks to my local Center Hardware, here in San Francisco for stocking nickel plated hollow split rivets, which are nearly identical to the rivets used by Leitz. These where used to fill the holes from the old rivets that held in the dividers.
Attachments
Andreas Thaler
Subscriber
The Fujica St801 is is not difficult to service. Just wash out the old dirt, give some new oil and it works again.
View attachment 360629
How did you clean it and which parts did you lubricate to which extent?
How did you clean it and which parts did you lubricate to which extent?
Mostly at the moving joints .
I used 3ml syringe to give few drops of anhydrous alcohol first, fired the shutter and it loosen a bit. Then I tried again with naphtha. After fired the shutter few times then I could see the old dirts came out . Then given a drop or 2 naphtha at that area, use a blower to blow them out on the tissue below.
The lubs I used are mixed:
oil (Moebius oil 9010) for the fast moving parts
light grease (from fishing tools) with a thin layer on the slow parts and edges of the triggers.
Cleaning the prism (above) is another thing and I didn't take the photos. Risky, deliciated, but it could work easily if you have good fingers and right tools . I highly recommend a spring hook, insulated and static-proof tools if you want to work on the upper part.
Andreas Thaler
Subscriber
Thanks 

On the other hand I bought a rather neglected and dusty TEAC AS-100 amp. I already have one and they are great, built like a tank. They generally go for good money these days, got it cheap because of the appearance and the fact the seller said it was down a channel and the switches and pots were noisy, sold as junk.


Must of been sitting in a shed for a very long time, but cleaned up nicely.
The underside was spotless

The circuits are original and unmolested

One speaker fuse was blown, hopefully the cause of the bad channel.

Dirty knobs.

Cleaned face plate

All cleaned up, cleaned the Pots and switches and all is working again and sounding good. Need to repaint the metal shell.

Must of been sitting in a shed for a very long time, but cleaned up nicely.
The underside was spotless
The circuits are original and unmolested
One speaker fuse was blown, hopefully the cause of the bad channel.
Dirty knobs.
Cleaned face plate
All cleaned up, cleaned the Pots and switches and all is working again and sounding good. Need to repaint the metal shell.
campy51
Subscriber
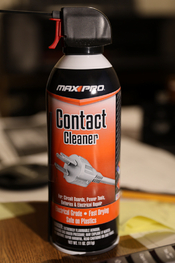
Had a Konica S II that came in a box of stuff I bought a few years ago and wanted to tinker a bit. Advance was working but shutter wasn't firing. Couldn't find a mechanical reason for not working so I went my favorite tool for cleaning shutters. Spayed the blades several times and wiped them clean and now it works fine, even 1 second. Light meter is active but changing speeds and f stop doesn't do anything. Any ideas? Cleaned the rangefinder and lenses and now tempted to buy a roll and try it but don't know if the camera is worthy of spending the money on film and developing.
Attachments
| Photrio.com contains affiliate links to products. We may receive a commission for purchases made through these links. To read our full affiliate disclosure statement please click Here. |
PHOTRIO PARTNERS EQUALLY FUNDING OUR COMMUNITY:  |