What did you fix today? (part 2)

Untitled

A
Untitled

  • 0
  • 0
  • 32
Jerome Leaves

H
Jerome Leaves

  • 2
  • 0
  • 52
Jerome

H
Jerome

  • 1
  • 0
  • 48
Sedona Tree

H
Sedona Tree

  • 1
  • 0
  • 51
Sedona

H
Sedona

  • 0
  • 0
  • 47

Recent Classifieds

Forum statistics

Threads
197,429
Messages
2,758,846
Members
99,494
Latest member
hyking1983
Recent bookmarks
0

AnselMortensen

Subscriber
Joined
Jun 9, 2020
Messages
2,257
Location
SFBayArea
Format
Traditional
A work in progress.
Bringing a 'barn find' 5x7 back to life.
Waiting for the glue to dry on the piece on the left.
Depression-era repairs are a pain to undo.
 

Attachments

  • 20240825_134235~2.jpg
    20240825_134235~2.jpg
    1.6 MB · Views: 27

Mr Flibble

Member
Joined
Mar 12, 2014
Messages
363
Location
The Lowlands
Format
35mm RF
Lovely project! Good luck on the restoration AnselMortensen.

My little repair jobs over the weekend weren't that noteworthy.
- I replaced a gooey film door light seal on an Olympus Trip 35.
- Cut a replacement viewfinder window for a KE-28 from an old CD-case and painted a crosshair on it.
 

AnselMortensen

Subscriber
Joined
Jun 9, 2020
Messages
2,257
Location
SFBayArea
Format
Traditional
A Ciro-Flex TLR that I picked up at a camera swap.
It still had a roll of Verichrome Pan in it with metal spools!
The viewing lens was hazy, dark & soft-focus, but the shutter checked out ok.
I took off the viewing hood and had easy access to the rear element of the viewing lens and the reflex mirror.
A few wipes with a PecPad and ROR, and most of the issue was resolved.
The ground glass and fresnel were attached to the hood, so I removed them and washed the gg with dish soap, dried it and reassembled everything.
Success!
 

forest bagger

Subscriber
Joined
Nov 9, 2023
Messages
244
Location
Germany
Format
DSLR
A NIKON DE-3 (viewfinder prism attachment) came to me with fungal infestation on the glass surfaces.
Opening the case was a bit difficult because one of the four screws had a damaged head due to overtightening, an the surrounding rubber seal was still very firmly glued.

DSC_11105.jpg


DSC_11106.jpg


After cleaning the glass surfaces of the prism and the eyepiece lenses which was easily achieved with isopropanol and glass cleaner, just re-gluing the surrounding rubber seal took some time...
 

Andreas Thaler

Subscriber
Joined
Nov 19, 2017
Messages
4,303
Location
Vienna/Austria
Format
35mm
A NIKON DE-3 (viewfinder prism attachment) came to me with fungal infestation on the glass surfaces.
Opening the case was a bit difficult because one of the four screws had a damaged head due to overtightening, an the surrounding rubber seal was still very firmly glued.

View attachment 377511

View attachment 377512


After cleaning the glass surfaces of the prism and the eyepiece lenses which was easily achieved with isopropanol and glass cleaner, just re-gluing the surrounding rubber seal took some time...

Thanks, interesting!

How did you solve the problem with the damaged screw head and the glue?
 

forest bagger

Subscriber
Joined
Nov 9, 2023
Messages
244
Location
Germany
Format
DSLR
I unscrewed the screw with a flathead screwdriver and after screwing it back in I filled its head with black paint so that the bare brass is no longer visible.
All that was needed to remove the rubber seal was a blunt flathead screwdriver and a lot of patience.
 

kl122002

Member
Joined
Apr 17, 2022
Messages
385
Location
Hong Kong
Format
Analog
Fixed someone who was ignorantly trying hard to force a CZJ late Zebra (non-electric) Flektogon to stay at f/2.8 at nearest distance.
He didn't know the aperture track is not vertical but slash-like on the bar. The aperture should automatically close down 1/4 to 1 stop at nearest distance .
 

AnselMortensen

Subscriber
Joined
Jun 9, 2020
Messages
2,257
Location
SFBayArea
Format
Traditional
I have a Norman "Normark 400" studio strobe that was firing intermittently.
Test button or sync cord...didn't matter, it would only fire intermittently.
Before giving it the heave-ho, I figured I'd play around with it & see if I could get it to work.
First step: Remove flash tube and re-install it.
Well, whaddya know...it fires every time now.
Ya gotta love an easy fix. 👍
 

kl122002

Member
Joined
Apr 17, 2022
Messages
385
Location
Hong Kong
Format
Analog
I have a Norman "Normark 400" studio strobe that was firing intermittently.
Test button or sync cord...didn't matter, it would only fire intermittently.
Before giving it the heave-ho, I figured I'd play around with it & see if I could get it to work.
First step: Remove flash tube and re-install it.
Well, whaddya know...it fires every time now.
Ya gotta love an easy fix. 👍

How about charge him a $50 for onsite inspection? 🤪
 

miha

Member
Joined
Feb 15, 2007
Messages
2,919
Location
Slovenia
Format
Multi Format
Today I cleaned my Durst enlarging lens, which had become foggy, by opening it with a spanner wrench I just received today. Enlarging lenses are easy to work with, as their optical and mechanical construction is straightforward—no complex optical assemblies, focusing helicoids, or automatic apertures. A few days ago, I also replaced the leatherette on my Mamiya C330:

1726768003999.png
 

AnselMortensen

Subscriber
Joined
Jun 9, 2020
Messages
2,257
Location
SFBayArea
Format
Traditional
Barn-find 5x7 restoration complete. 👍
 

Attachments

  • 20240928_173756~2.jpg
    20240928_173756~2.jpg
    703 KB · Views: 27
  • 20240928_173806~2.jpg
    20240928_173806~2.jpg
    733.9 KB · Views: 27
  • 20240928_173733~2.jpg
    20240928_173733~2.jpg
    866.9 KB · Views: 29
  • 20240928_173744~2.jpg
    20240928_173744~2.jpg
    966.2 KB · Views: 30

Helios 1984

Member
Joined
Aug 4, 2015
Messages
1,844
Location
Saint-Constant, Québec
Format
35mm
I've worked on a few things during the summer; Brought back to life a Volvo Station wagon destined for the scrapyard, a couple of push mowers, an old Homelite chainsaw, and a vintage Czechoslovakian road bike I found on the curb that I turned into a cruiser, and a Singer sewing machine. Right now, I'm working on a Craftsman snowblower that a neighbour gave me for free, and a used fordable e-bike that I bought as a donation to the SPCA. The former needed some de-rusting, painting, carb rebuild, a few adjustments and new belts that I haven't received yet. The latter turned out to have a battery in operational condition, I couldn't believe it, it just needs a new throttle and potentially a controller.
 

Mr Flibble

Member
Joined
Mar 12, 2014
Messages
363
Location
The Lowlands
Format
35mm RF
Was given a bunch of cameras in a box last week, in a "I'm sure you can use some of this" way.
It included a KW Praktica FX2 that I though was worth rescuing. The rest was rather....meh...

It took an hour with ceramic stove top cleaner to bring back some lustre to the metal parts.
The stop-down pusher was a little rusty and bent out of shape. Simple job

Had to dig around a bit through the stash for another M42 lens, found a Helios.
PrakticaFX201.jpg


Ordered a correct CZJ 50/2.8 Tessar lens for it, to complete the set
 

P C Headland

Subscriber
Joined
Mar 24, 2005
Messages
814
Location
New Zealand
Format
Multi Format
Over the weekend I replaced the half silvered RF mirror in my Brain Gloria. The RF "mirror" replacement wasn't too challenging, but finding the unknown number of parts making up the shutter release mechanism that took their chance to make a bid for freedom did provide a challenge.

Camera:
IMG_5495 Large.jpeg

Top off. RF mirror replaced is the larger, lower one in the picture below:
IMG_5813 Large.jpeg


How many pieces were there, and how do they fit together. I found to bits (the release and a brass collar), but it wasn't until later in the day did I find a small spring on the floor. A bit of experimenting and I managed to work out the correct order and orientation of the three parts.

Brass collar (bottom), spring and shutter release in shutter interlock / double exposure prevention mechanism:
IMG_5816 Large.jpeg
 

lensman_nh

Member
Joined
Nov 18, 2010
Messages
105
Location
New Hampshire
Format
Multi Format
Does taking lenes apart and cleaning out fungus count as fixing something?

If so, I cleaned a Pentax SMC 80-200 zoom, the 50mm f2.8 El-NIKKOR enlarging lens I've owned since 1982 and a Mamiya 645 210mm lens.

With fungus killing lenses I've been a lot more willing to learn how to disassemble and fix these things. If I fail and break it, well, it was on the way to the scrap heap anyway.

So far, I've managed to not break anything and not have any parts left over. But it does bring home the fact that all of my film equipment is running on life support. At this point, when it's gone, it's gone. And good condition replacements in the marketplace are not guaranteed.
 

Mr Flibble

Member
Joined
Mar 12, 2014
Messages
363
Location
The Lowlands
Format
35mm RF
Had the chance to rummage through three boxes of surplus camera gear I had stored in the attic. Thought it was time to tackle one of the Agfa Isolette I cameras in there.
It had a stuck focus, from the dried out 'green goo'. Like they all do....

Removed the shutter assembly from the body,
Removed the stuck front focusing element with the middle lens element,
Put the stuck parts in the oven and baked them at 200C for a couple of minutes.
That unstuck the parts.
Cleaned off the Green Goo. and replaced it with Lubriplate 130a
Reassembled the camera.
Did a quick-and-dirty focus calibration with a ground glass.

Will fine-tune the focus later today.
 

Donald Qualls

Subscriber
Joined
Jan 19, 2005
Messages
12,055
Location
North Carolina
Format
Multi Format
Put the stuck parts in the oven and baked them at 200C for a couple of minutes.

I'll have to remember that. My oven would say between 375 and 400 for that. Those low-end Isolettes are still inexpensive for a 6x6 folder...
 

Mr Flibble

Member
Joined
Mar 12, 2014
Messages
363
Location
The Lowlands
Format
35mm RF
I started a 100 C, but it wouldn't budge. Same with 150 and 180C. So I just did full blast. Roughly 4 minutes I think.
Handling a blazing hot small part with oven mitts isn't easy, I can tell you!
 

Donald Qualls

Subscriber
Joined
Jan 19, 2005
Messages
12,055
Location
North Carolina
Format
Multi Format
Handling a blazing hot small part with oven mitts isn't easy, I can tell you!

Yep. We have a toaster oven in my tool repair shop, some tools are made to have heat-shrink fits.
 

SalveSlog

Subscriber
Joined
Sep 29, 2013
Messages
269
Location
Southern Norway
Format
Medium Format
I have a lot of Compur shutters that needs service. I have tested my skills on some Prontors with reasonable success but I suspect that the Compurs are even more demanding. So I figured it would be wise to start with an early version ...

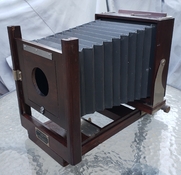
A Voigtländer Avus 9x12 camera of mine has a Dial set Compur shutter. It ran at full speed on all settings. And I could see that one of the 3 blades was not sitting right. Plus, the aperture blades all looked fine but I could not adjust it the full span.

Getting inside I found the unit next to the main drive was cluttered with old stiff grease:
dial-compur-1.jpg

The stiff grease would not allow the lever that couples to the gears to return to its start position. In addition: the spring on that lever was rather slack. (It had no tension at all against the post when I pushed the lever to its start position.)

I removed, cleaned and very lightly lubed the connection from the main spring all the way to the pendulum with dry moly powder and carefully blew away what did not stick. The surface of the main drive I gave a little bit of new grease. Also the other long lever controlling the action of the pendulum on the star wheel was cleaned and very lightly lubed with moly powder.

This made the 1/1 setting run amazingly correct!

***

I left most of the other parts of the mechanism untouched as they seemed to be OK and went to visit the shutter blades.
dial-compur-2.jpg

Two of the blades were where they are supposed to be: seated well on their respective pins. But the third was supposed to be fastened by a screw. That screw had become loose. I found it in the channel for the aperture blade connection. I cleaned the blades and the plate and put the blades back.

The shutter is now running quite nicely. The three slowest speeds I'm actually tempted call perfect! But the faster speeds are all somewhat slow. I may get back in to clean the actuator ring for the shutter blades. Apart from the grease on the main drive and its neighbour unit, the rest of the shutter didn't really seem dirty or greasy at all. But I know there is something to be gained by cleaning old things like these anyway.

And I'd say I have the required confidence, now!
 
Last edited:
Photrio.com contains affiliate links to products. We may receive a commission for purchases made through these links.
To read our full affiliate disclosure statement please click Here.

PHOTRIO PARTNERS EQUALLY FUNDING OUR COMMUNITY:


Ilford ADOX Freestyle Photographic Stearman Press Weldon Color Lab Blue Moon Camera & Machine
Top Bottom